Creating External Credentials
This guide walks you through setting up an External Credential in Salesforce for integration with Authenticx. This step follows completion of the Authenticx as an Auth Provider setup.
Prerequisites
- Salesforce Administrator access
- An Authenticx Auth Provider already configured (see: Authenticx as an Auth Provider guide)
Configuration Steps
1. Log into Salesforce
Sign in using your administrator credentials.
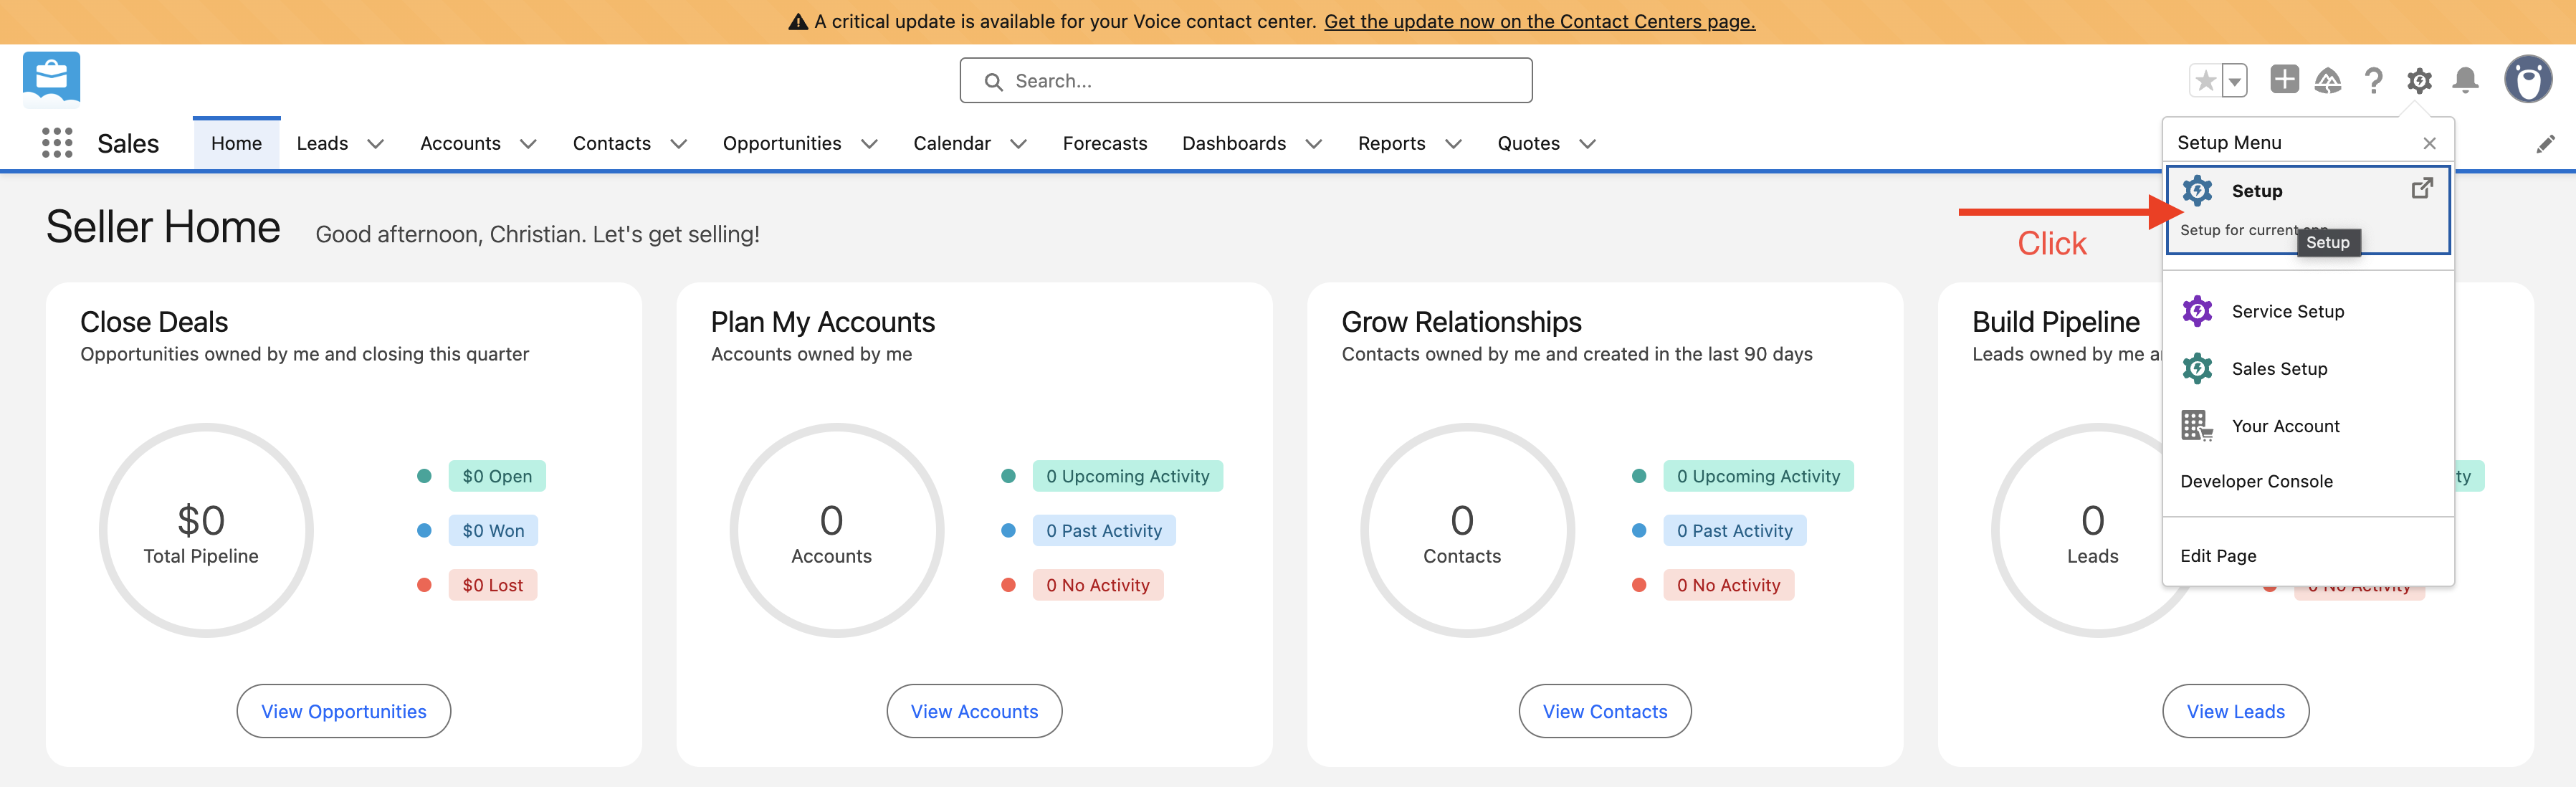
2. Open Setup
Click the ⚙️ Setup icon in the upper right and select Setup.
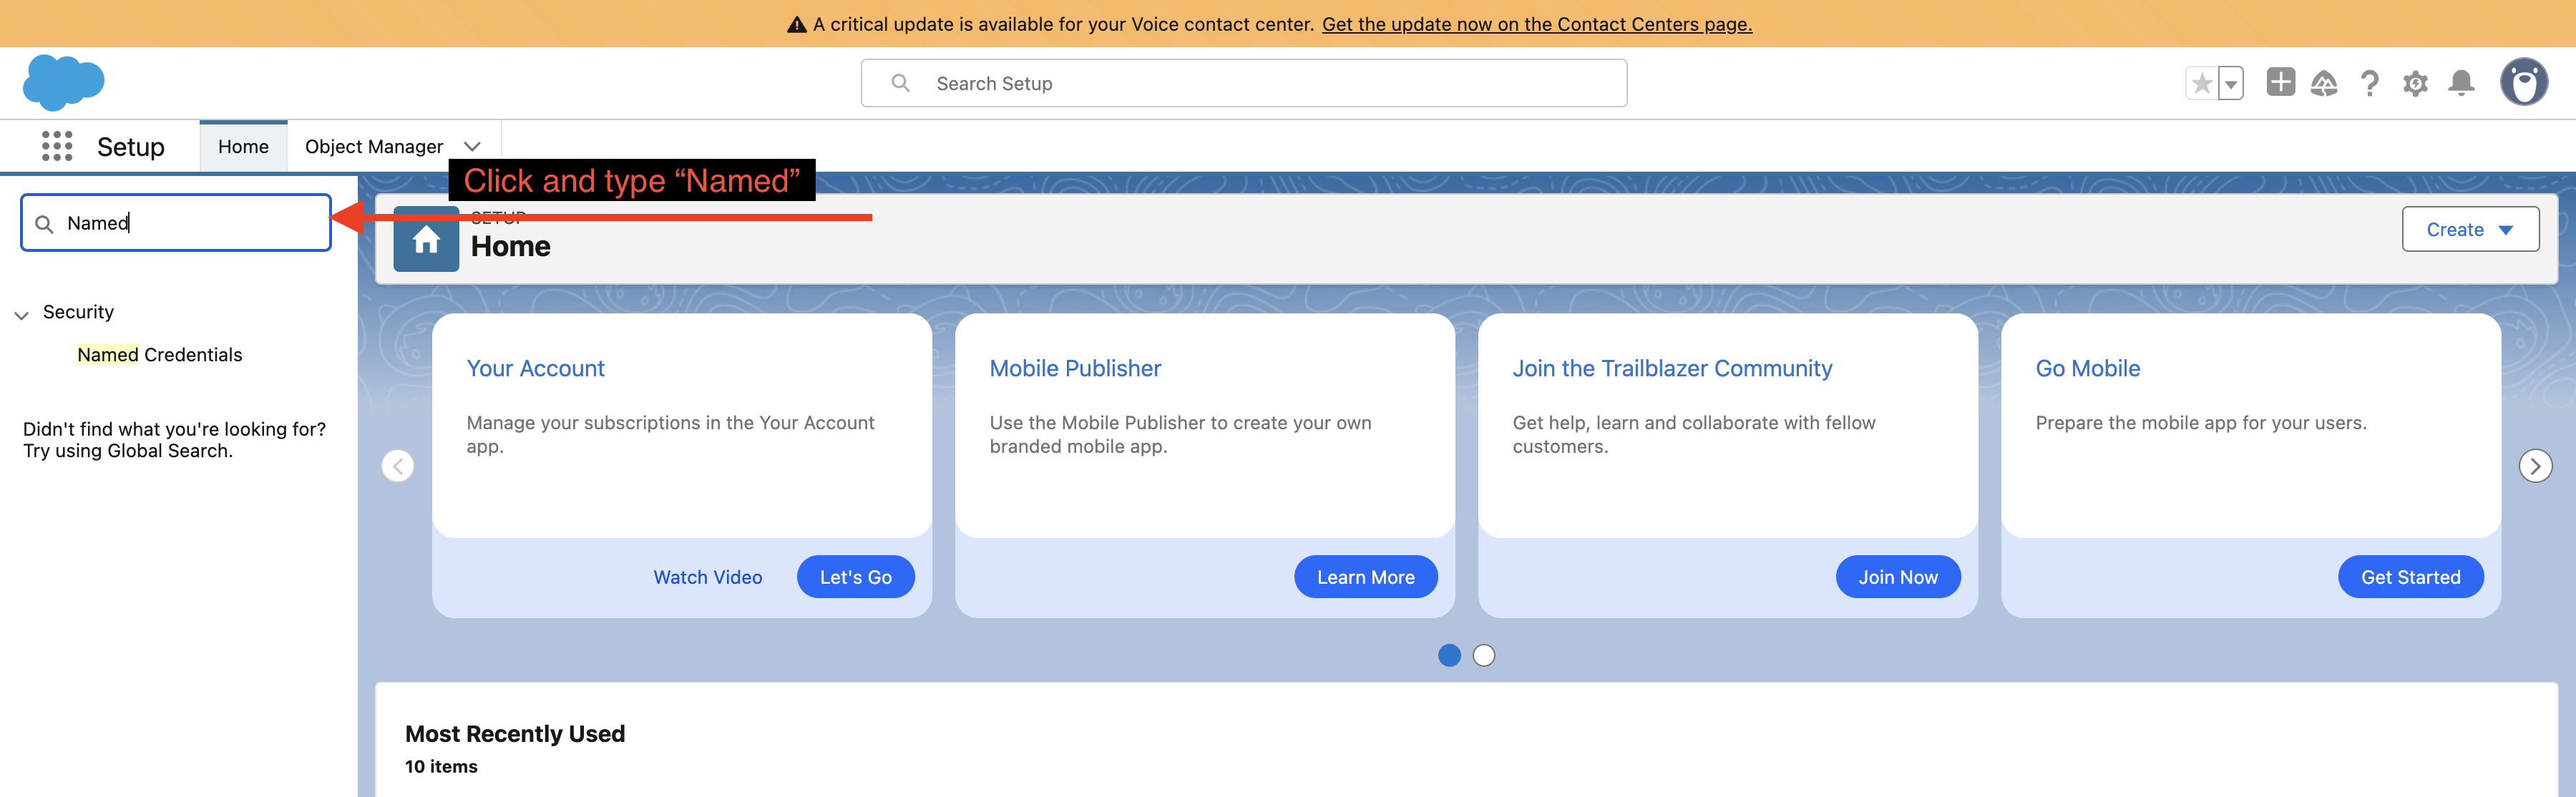
3. Locate "Named Credentials"
In the Quick Find box (left menu), type Named.
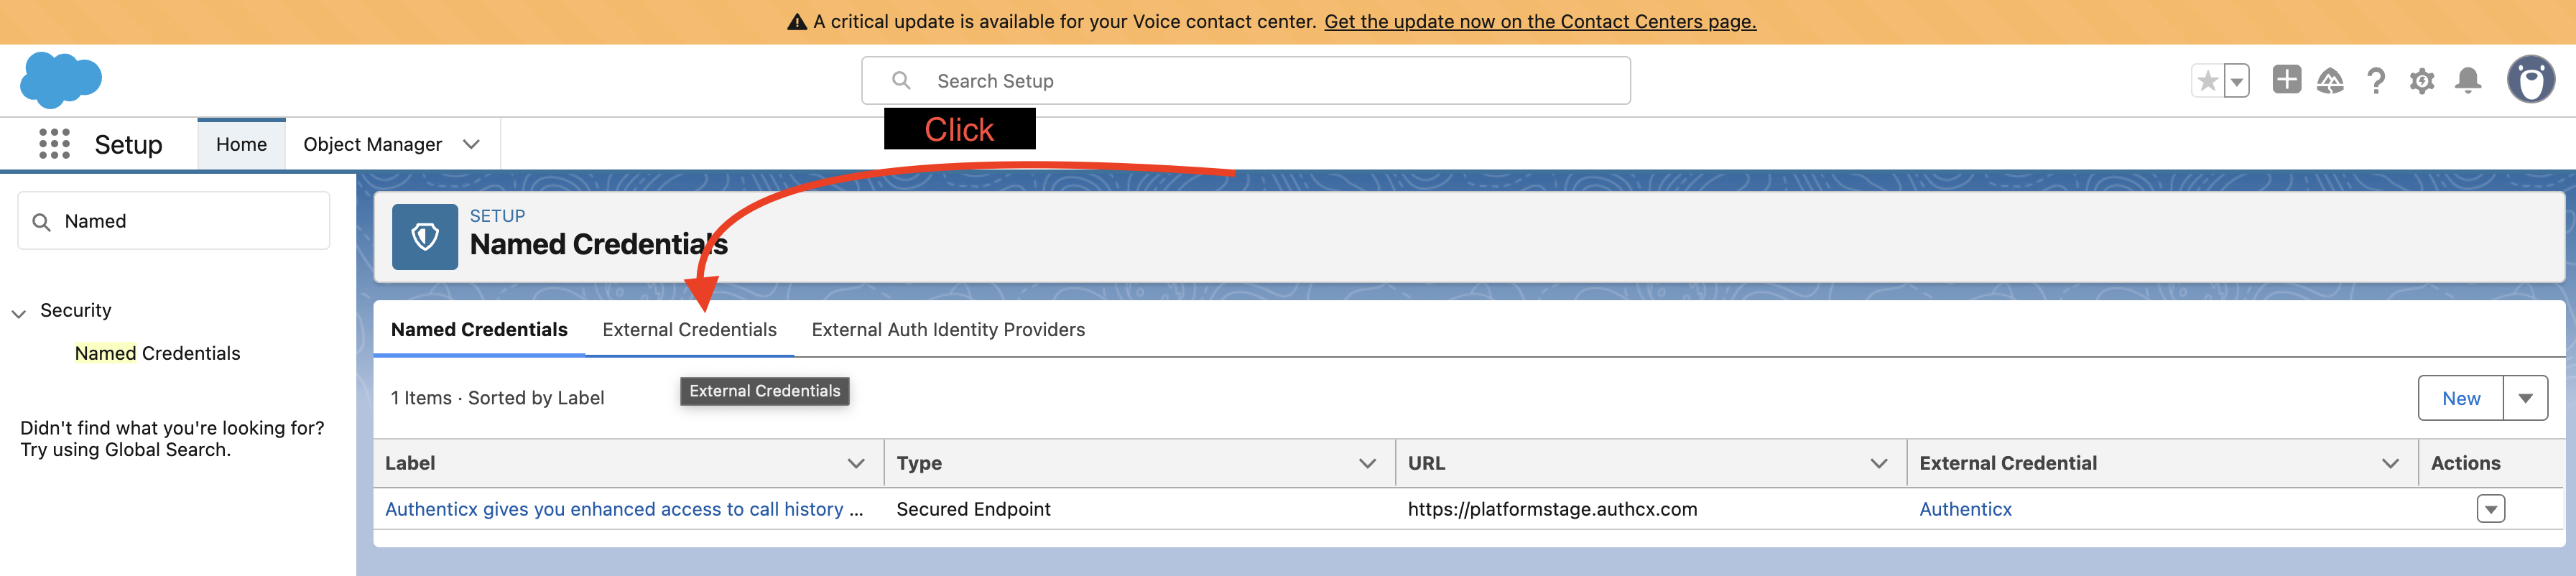
4. Navigate to External Credentials
Under Security, select Named Credentials, then go to the External Credentials tab.
5. Create a New External Credential
Click New. Fill in the form as follows:
| Field | Value |
|---|---|
| Label | Authenticx |
| Name | Authenticx |
| Authentication Protocol | OAuth 2.0 |
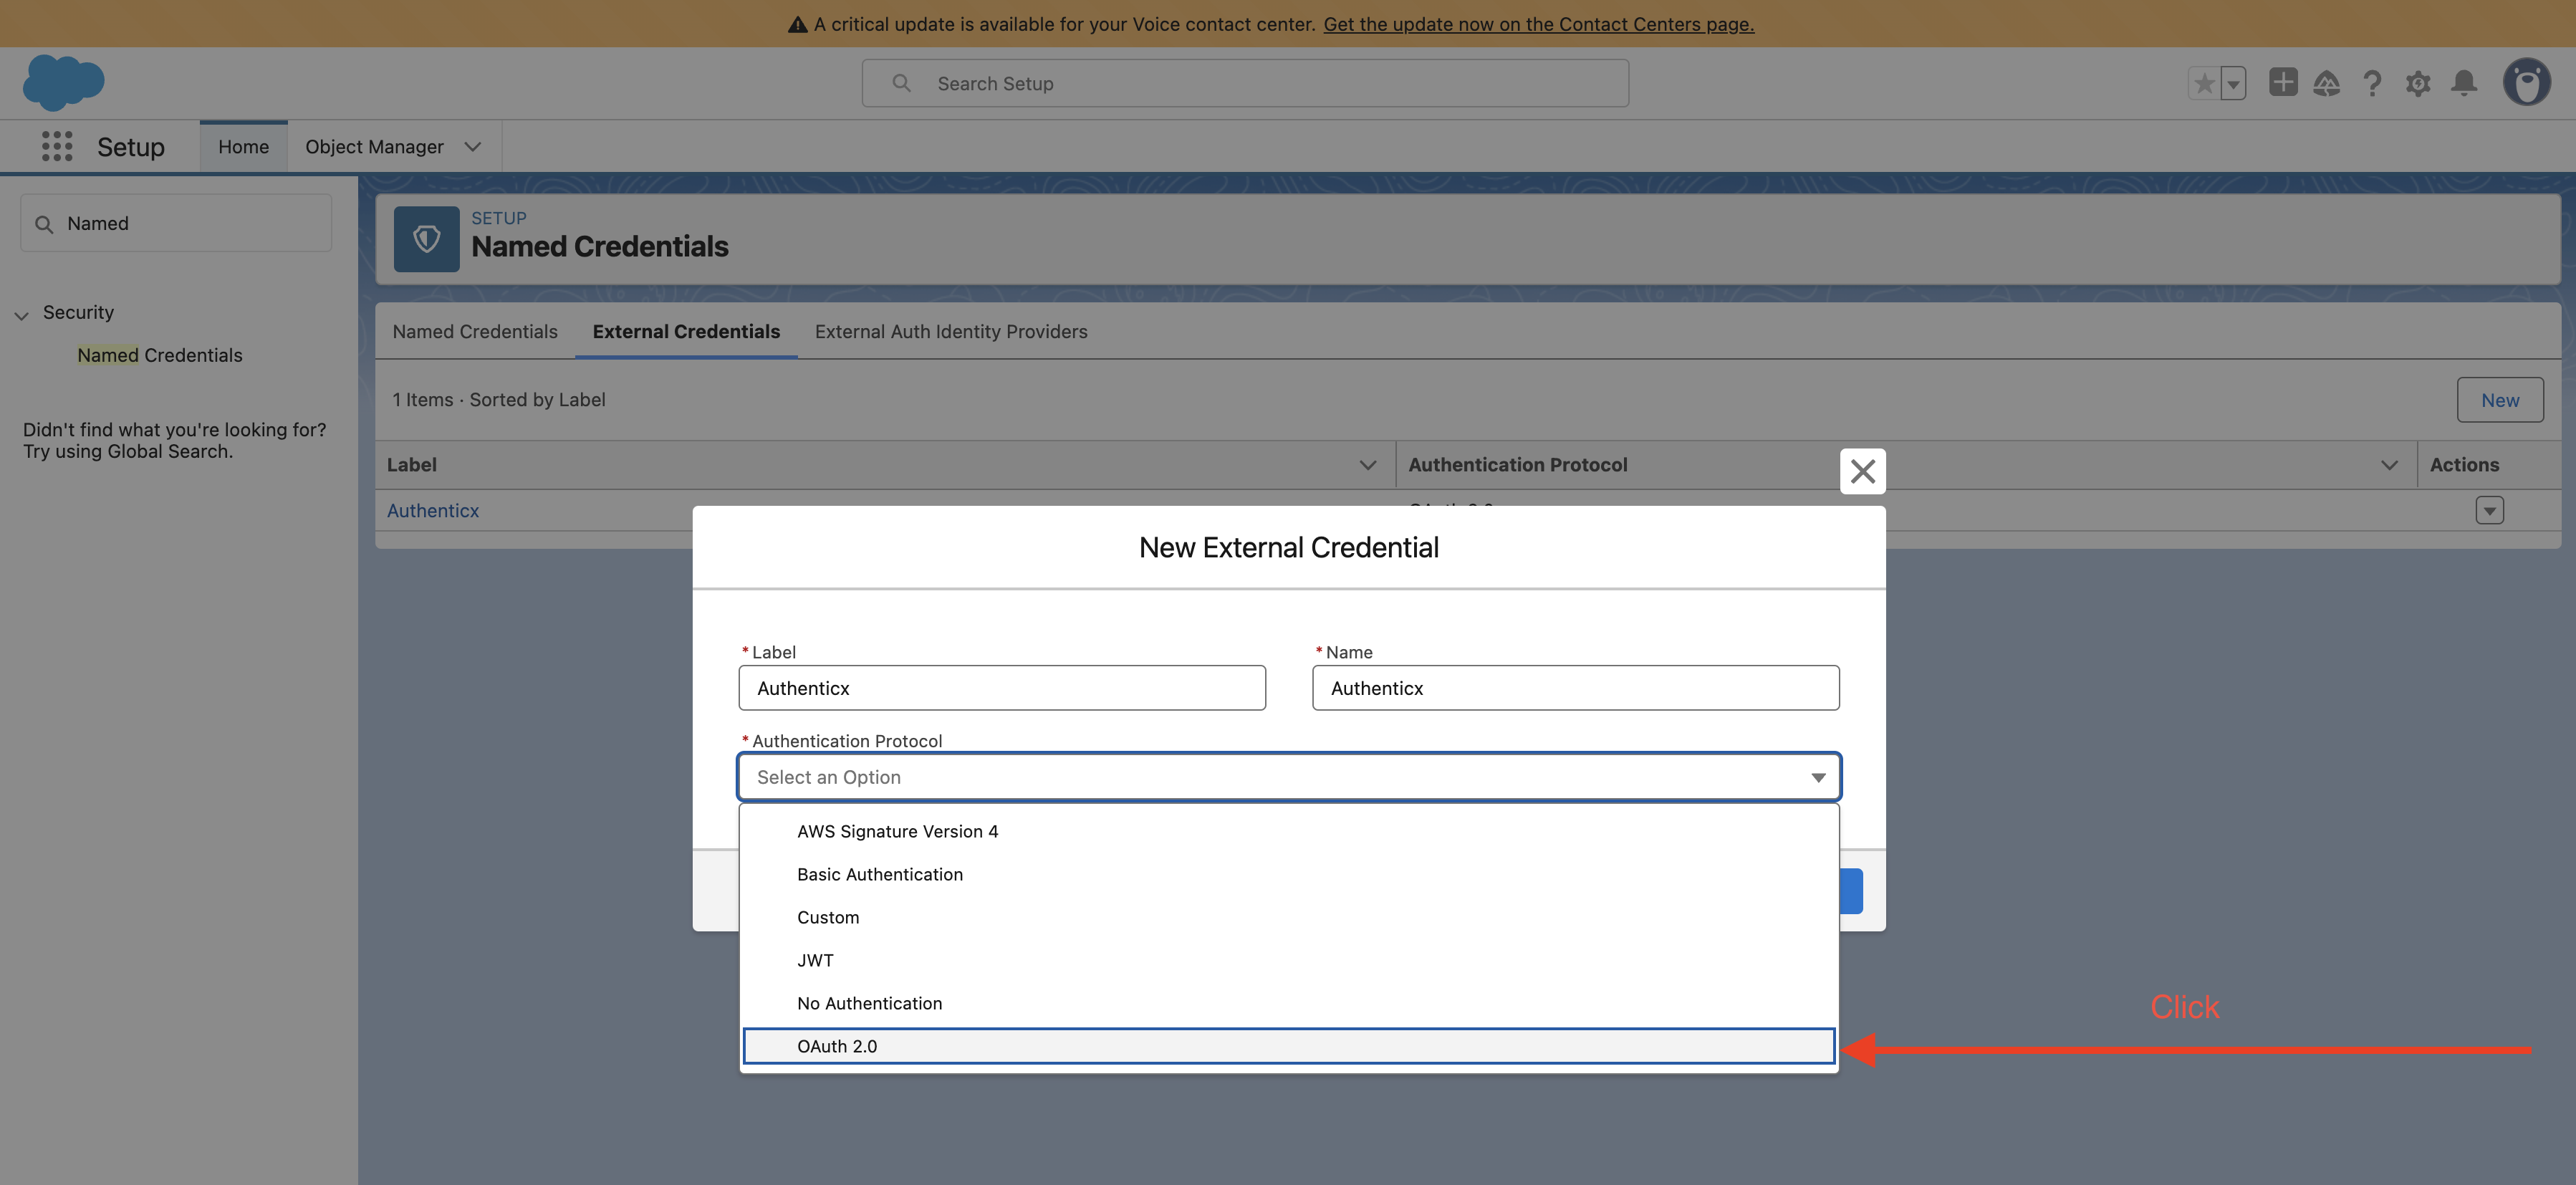
| Field | Value |
|---|---|
| Authentication Flow Type | Browser Flow (auto-populated) |
| Scope | (leave blank) |
| Identity Provider | Auth. Provider → Authenticx |
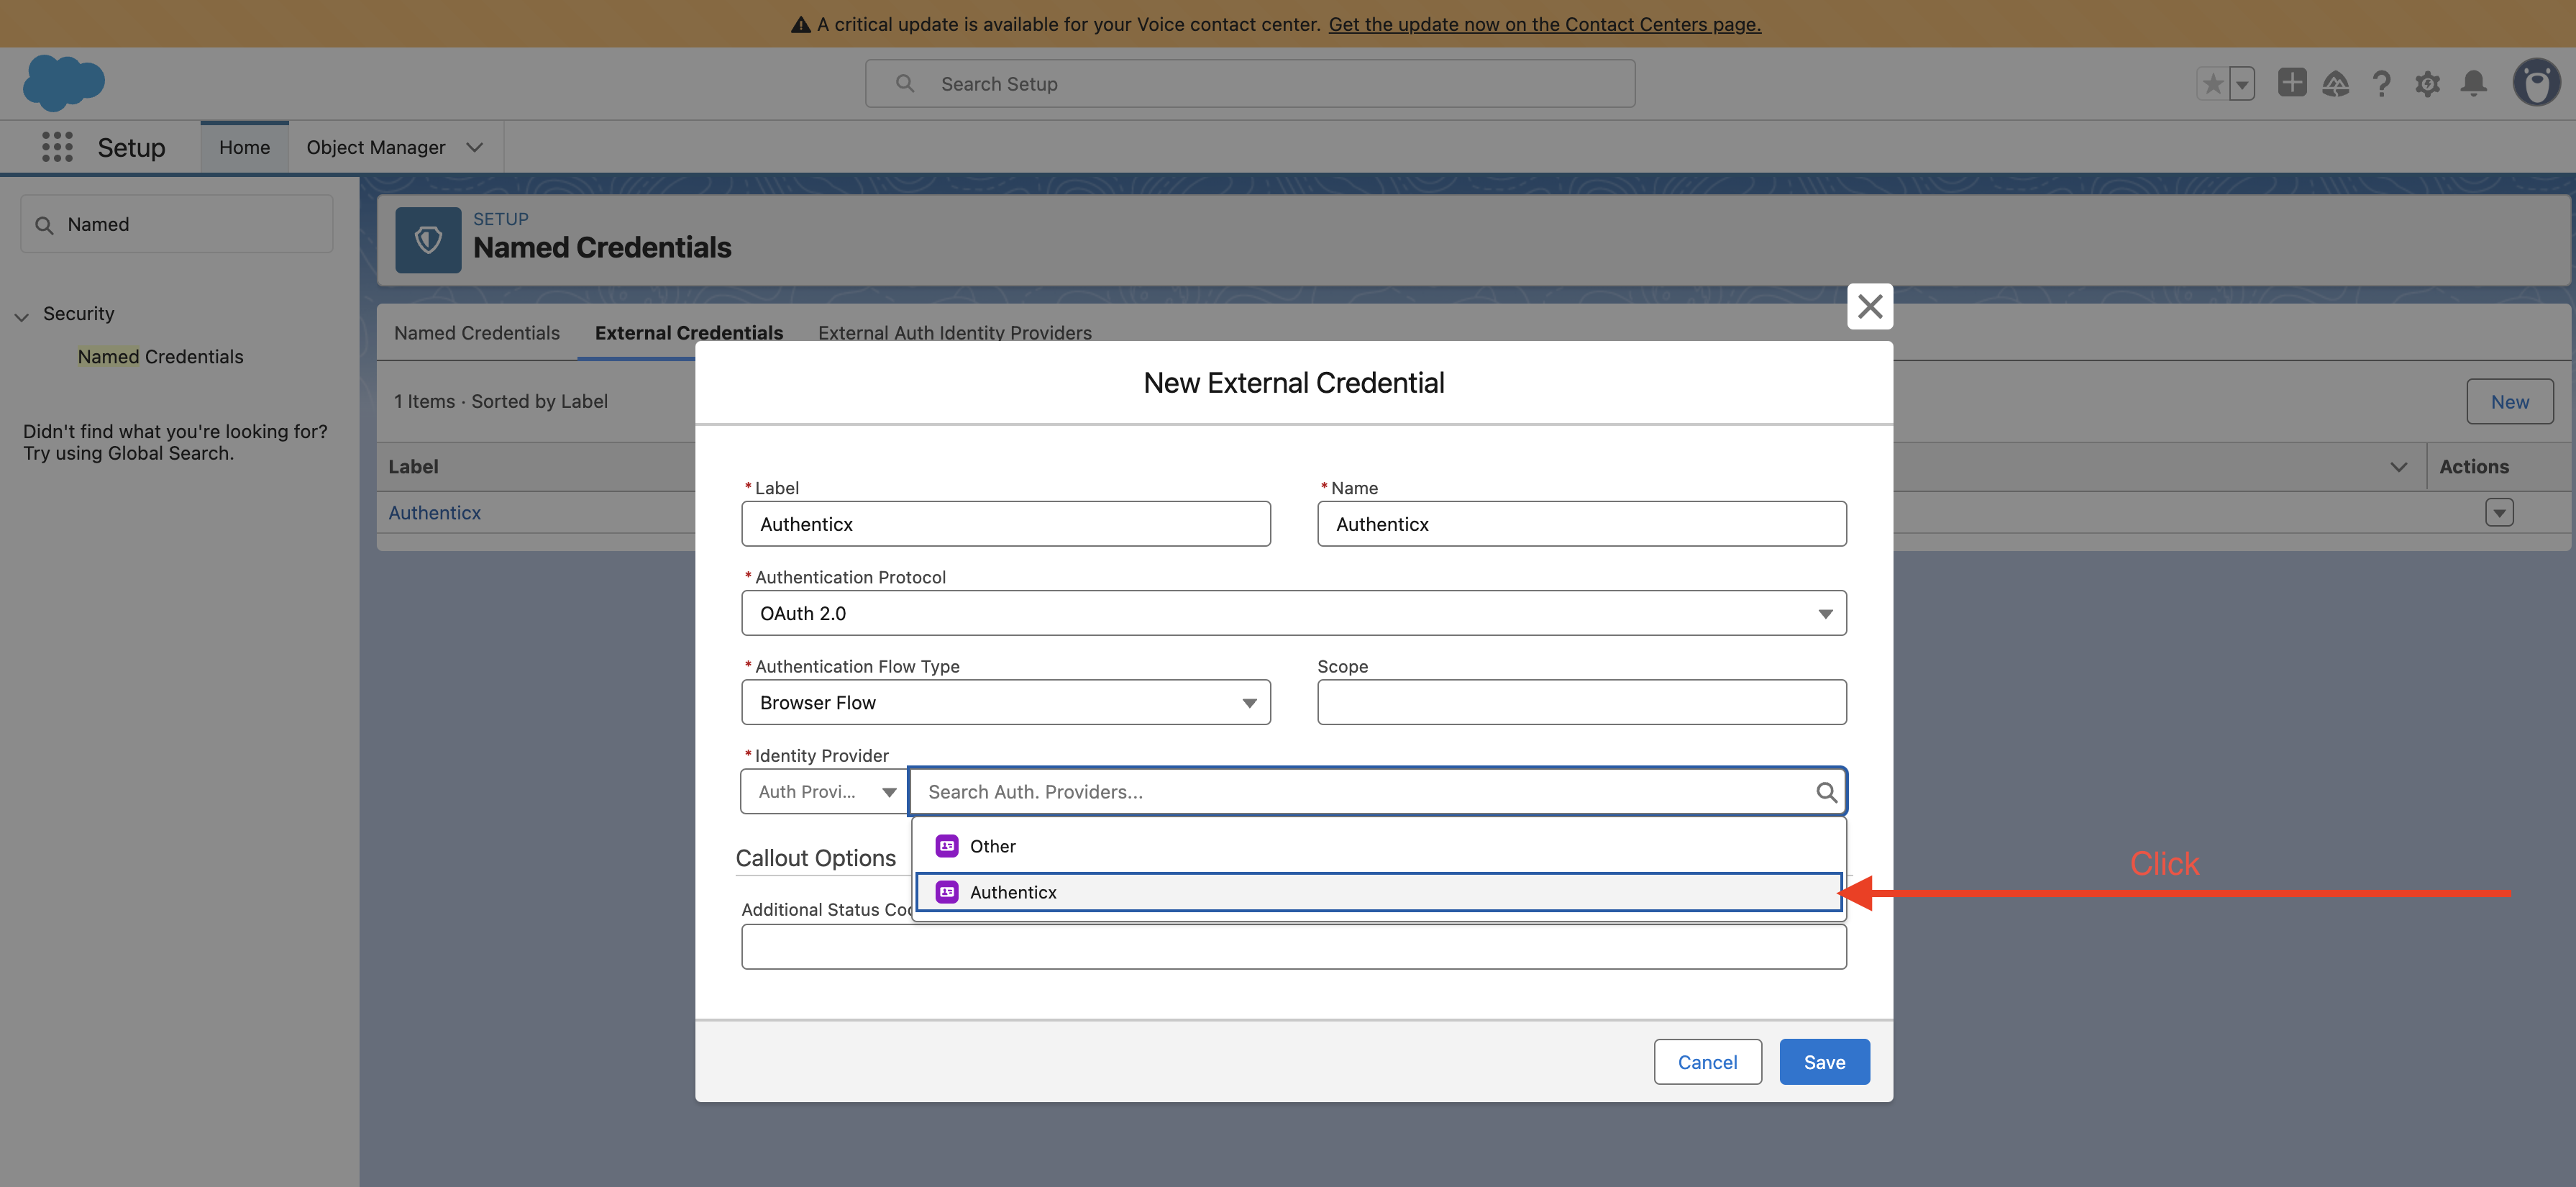
Ensure "Authenticx" appears as a valid Auth Provider from your previous configuration.
| Field | Value |
|---|---|
| Label | Authenticx |
| Name | Authenticx |
| Authentication Protocol | OAuth 2.0 |
| Authentication Flow Type | Browser Flow (auto-populated) |
| Scope | (leave blank) |
| Identity Provider | Auth. Provider → Authenticx |
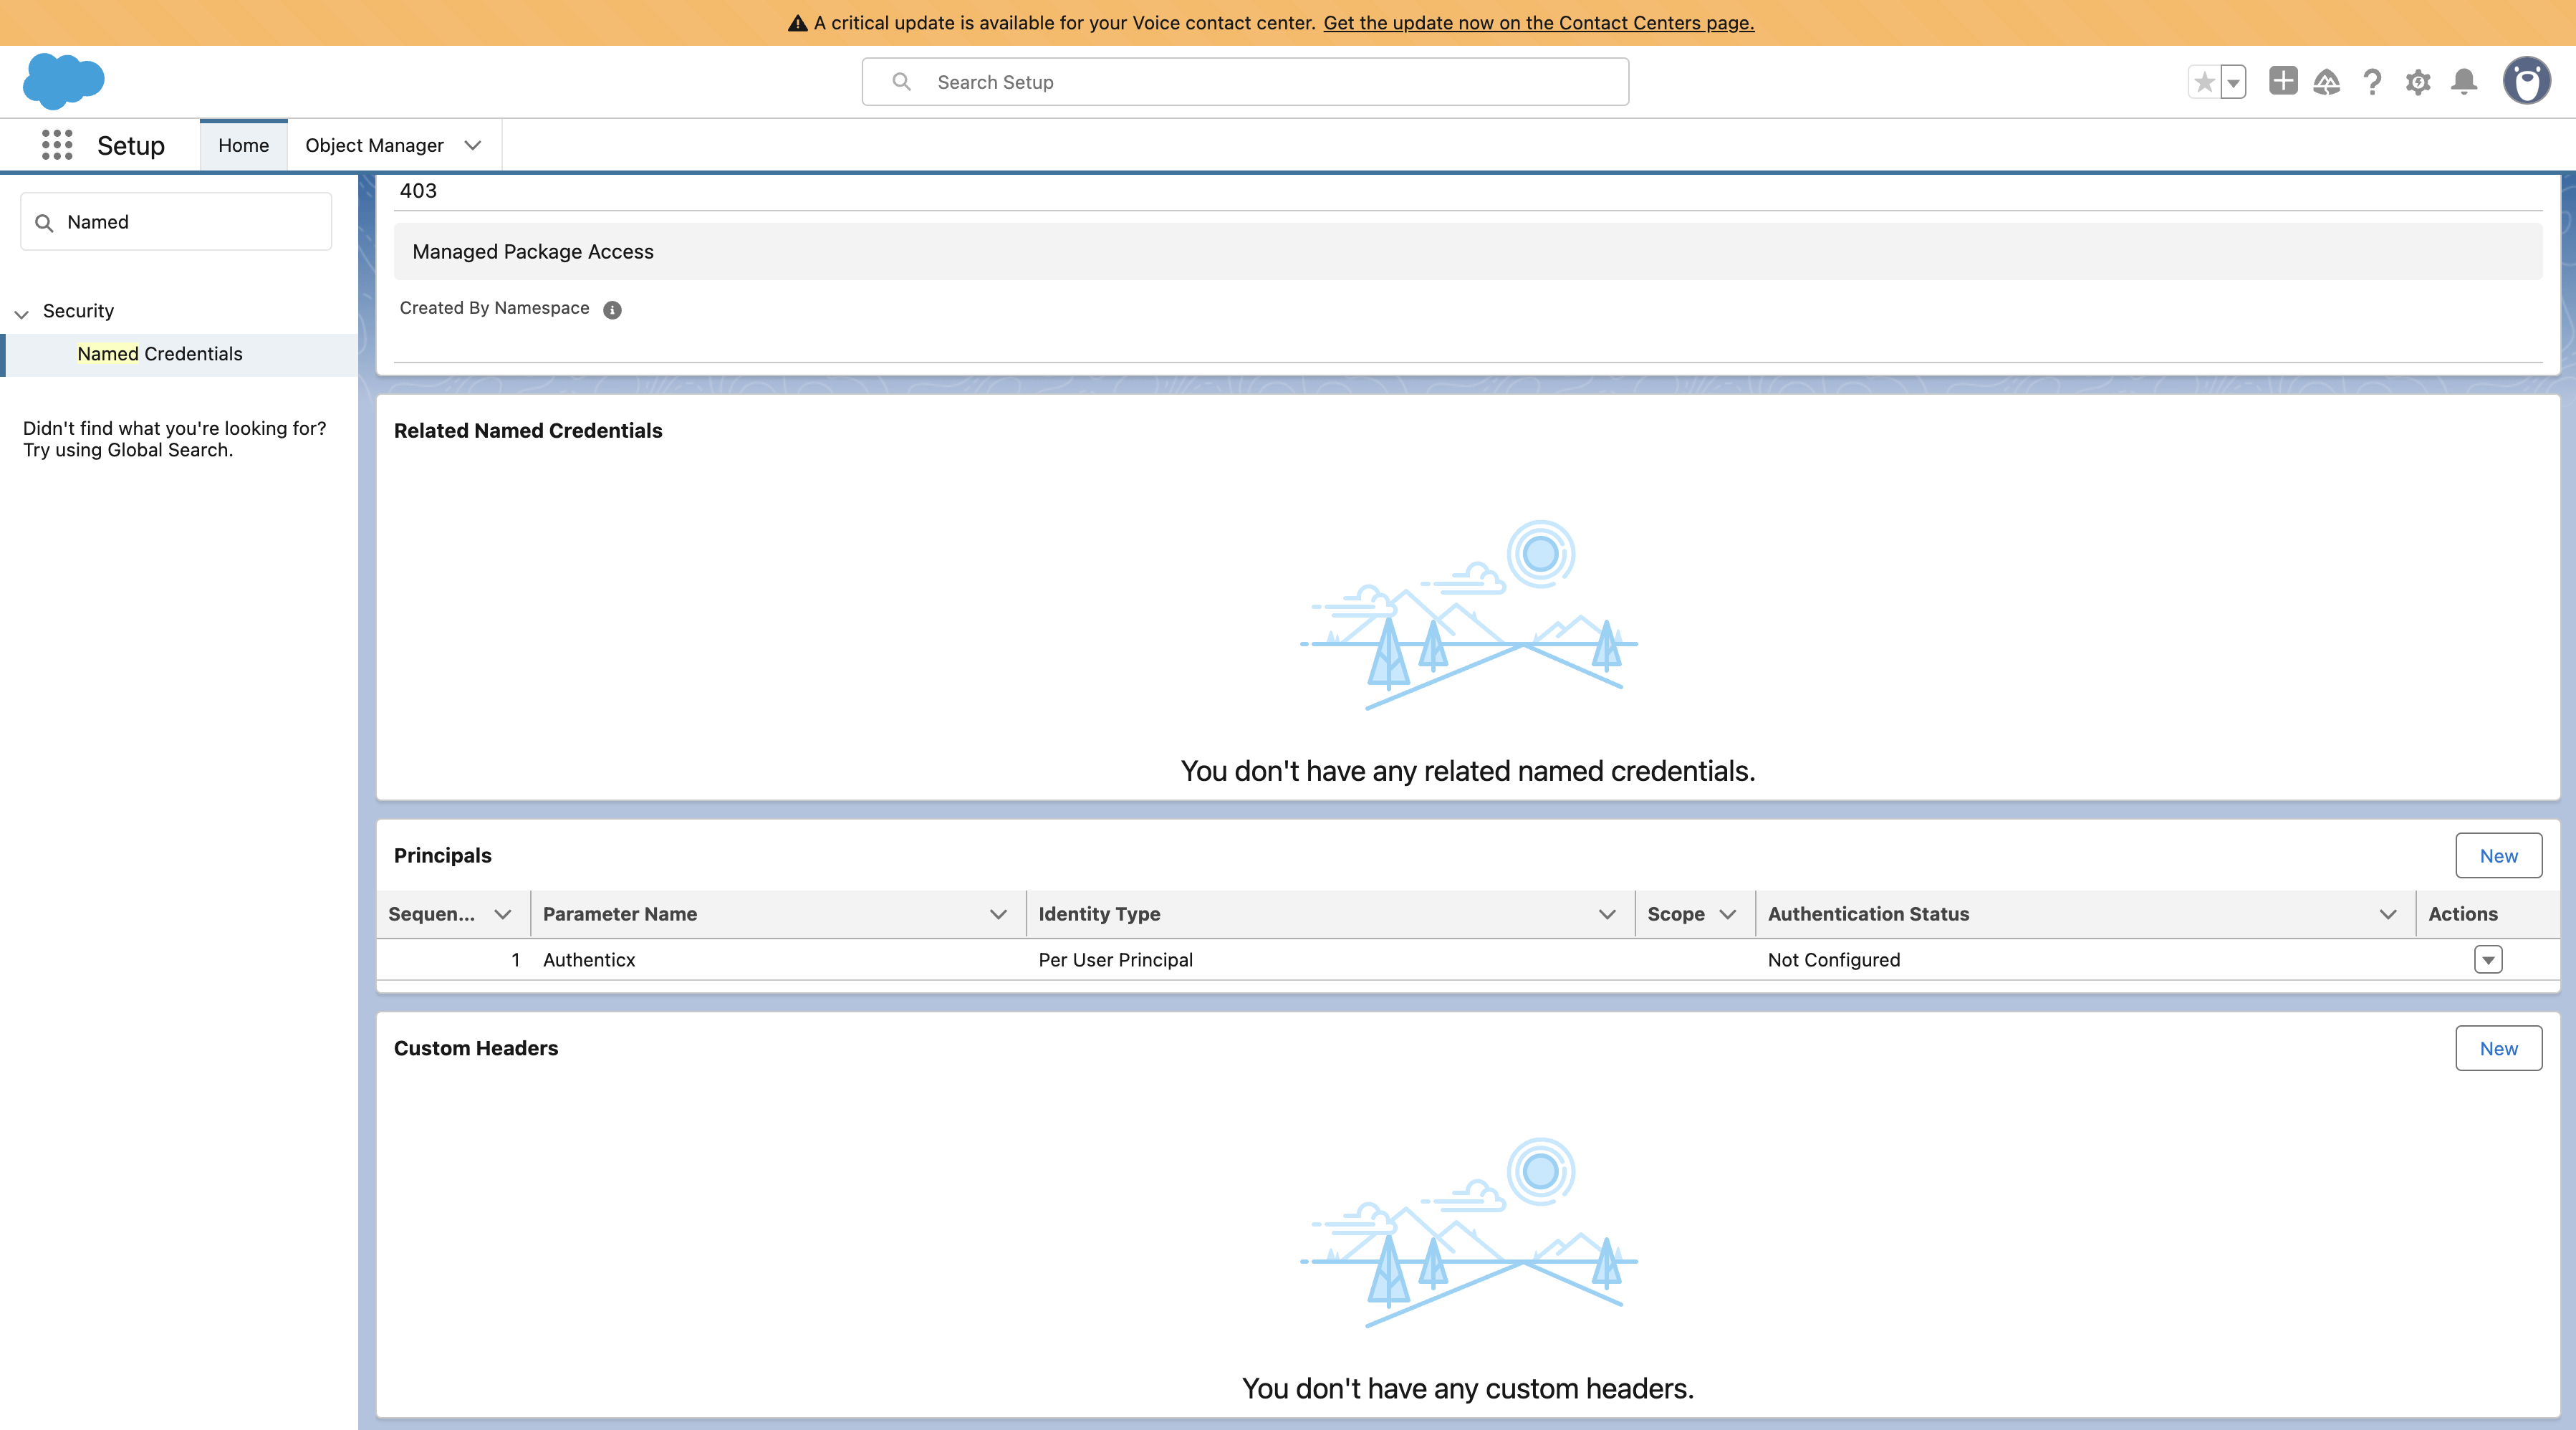
| Additional Status Codes for Token Refresh | 403 |
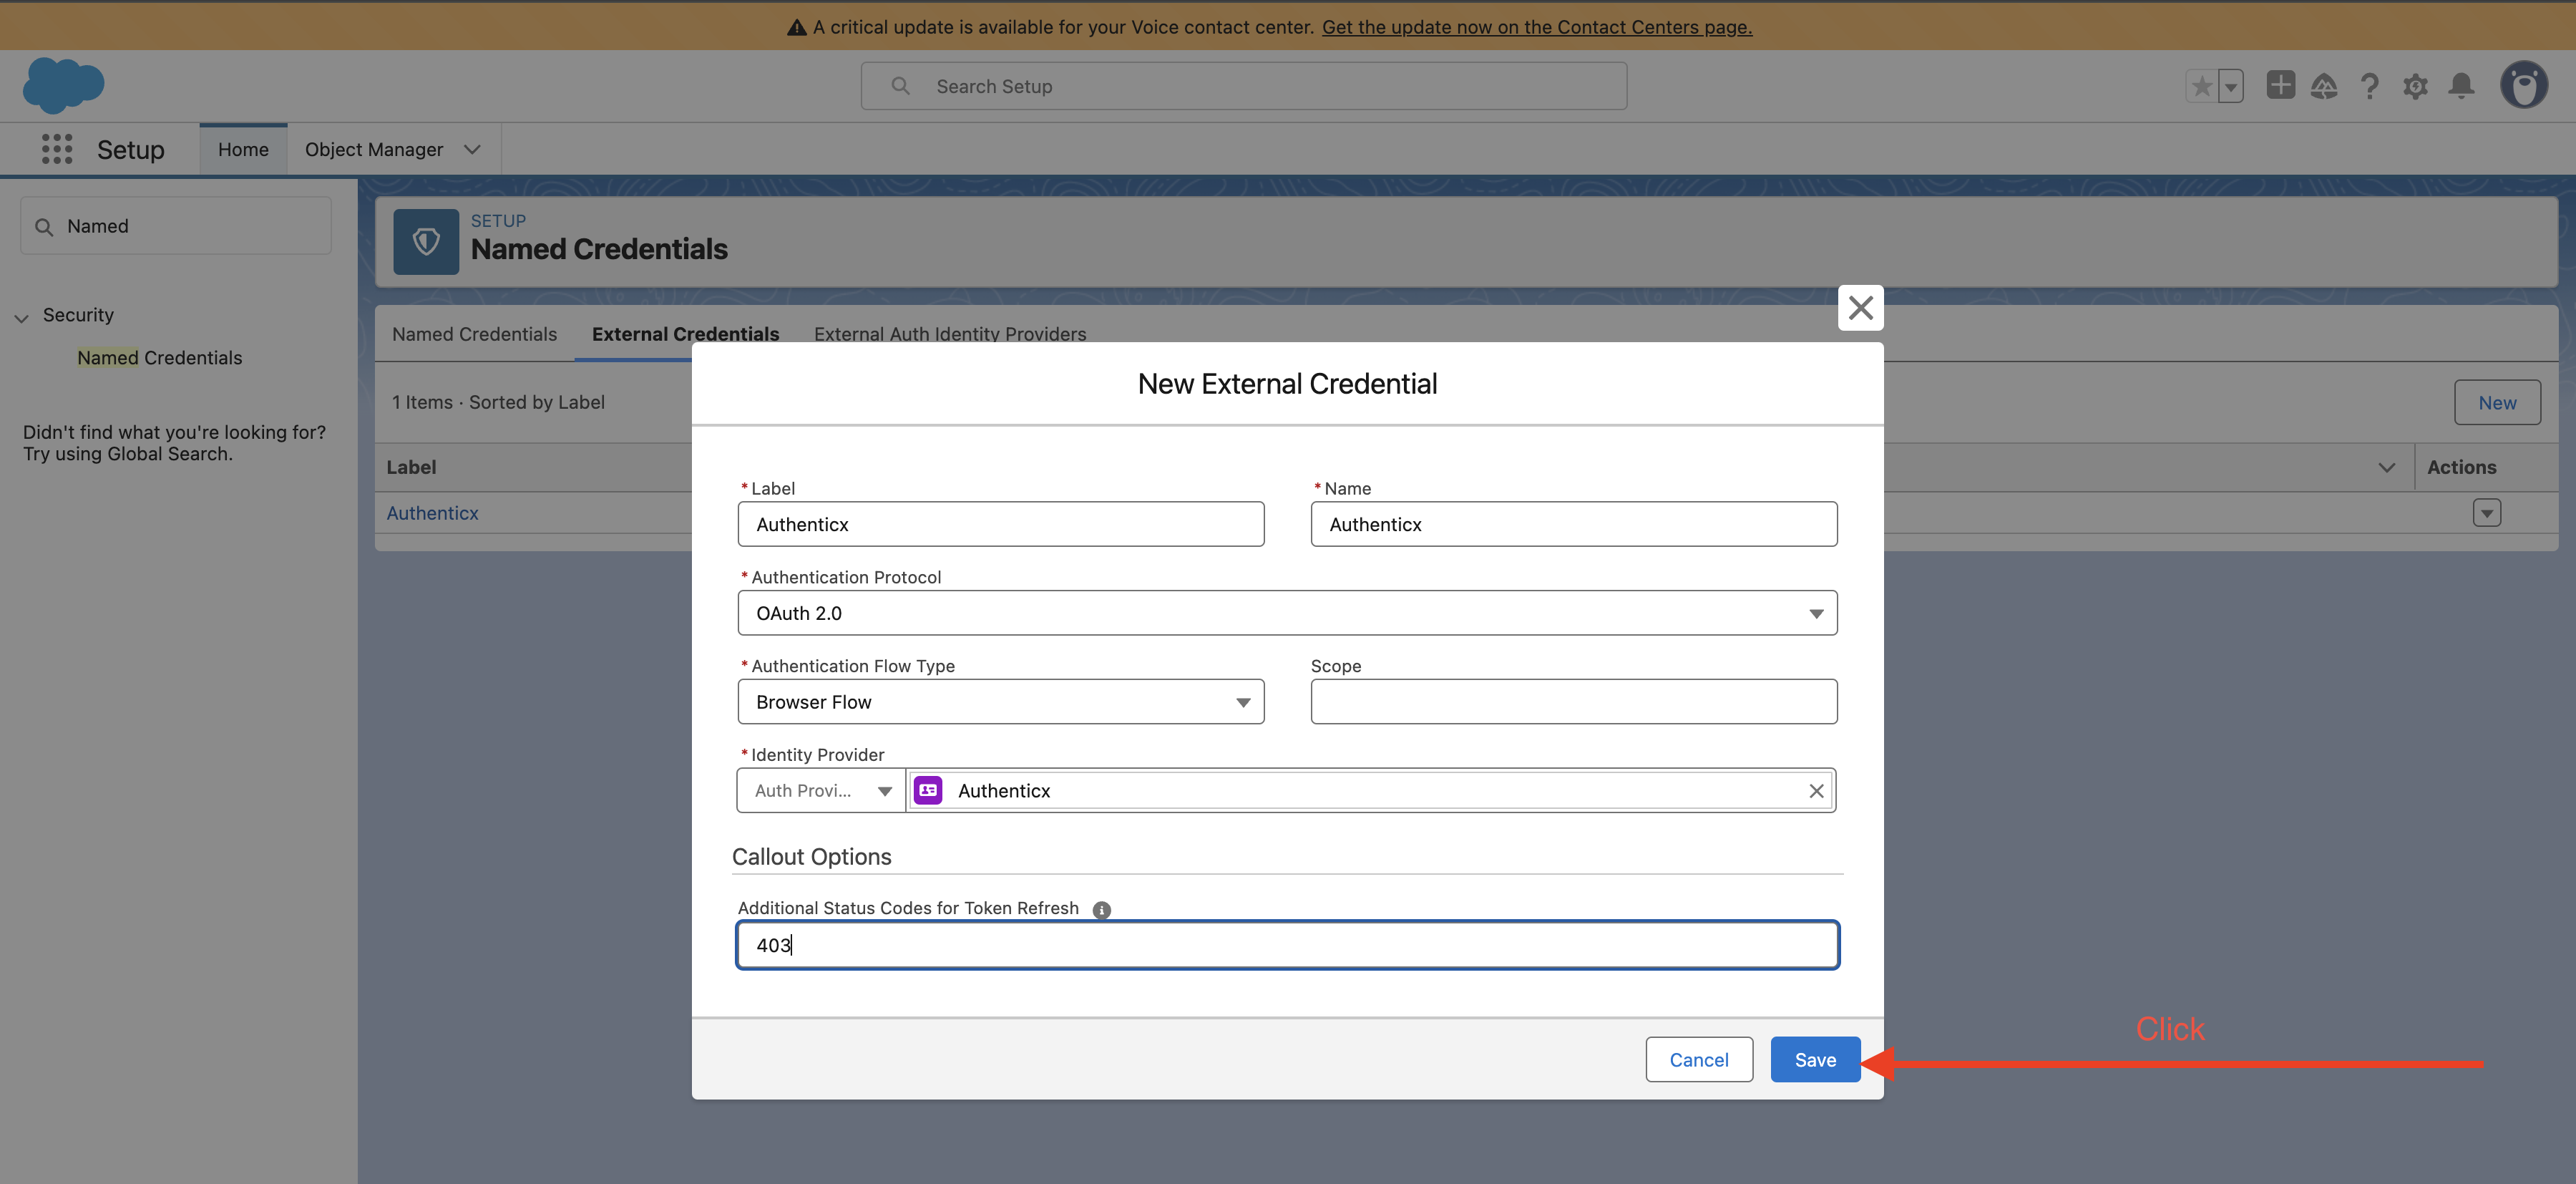
Ensure all values are populated as depicted above and Save.
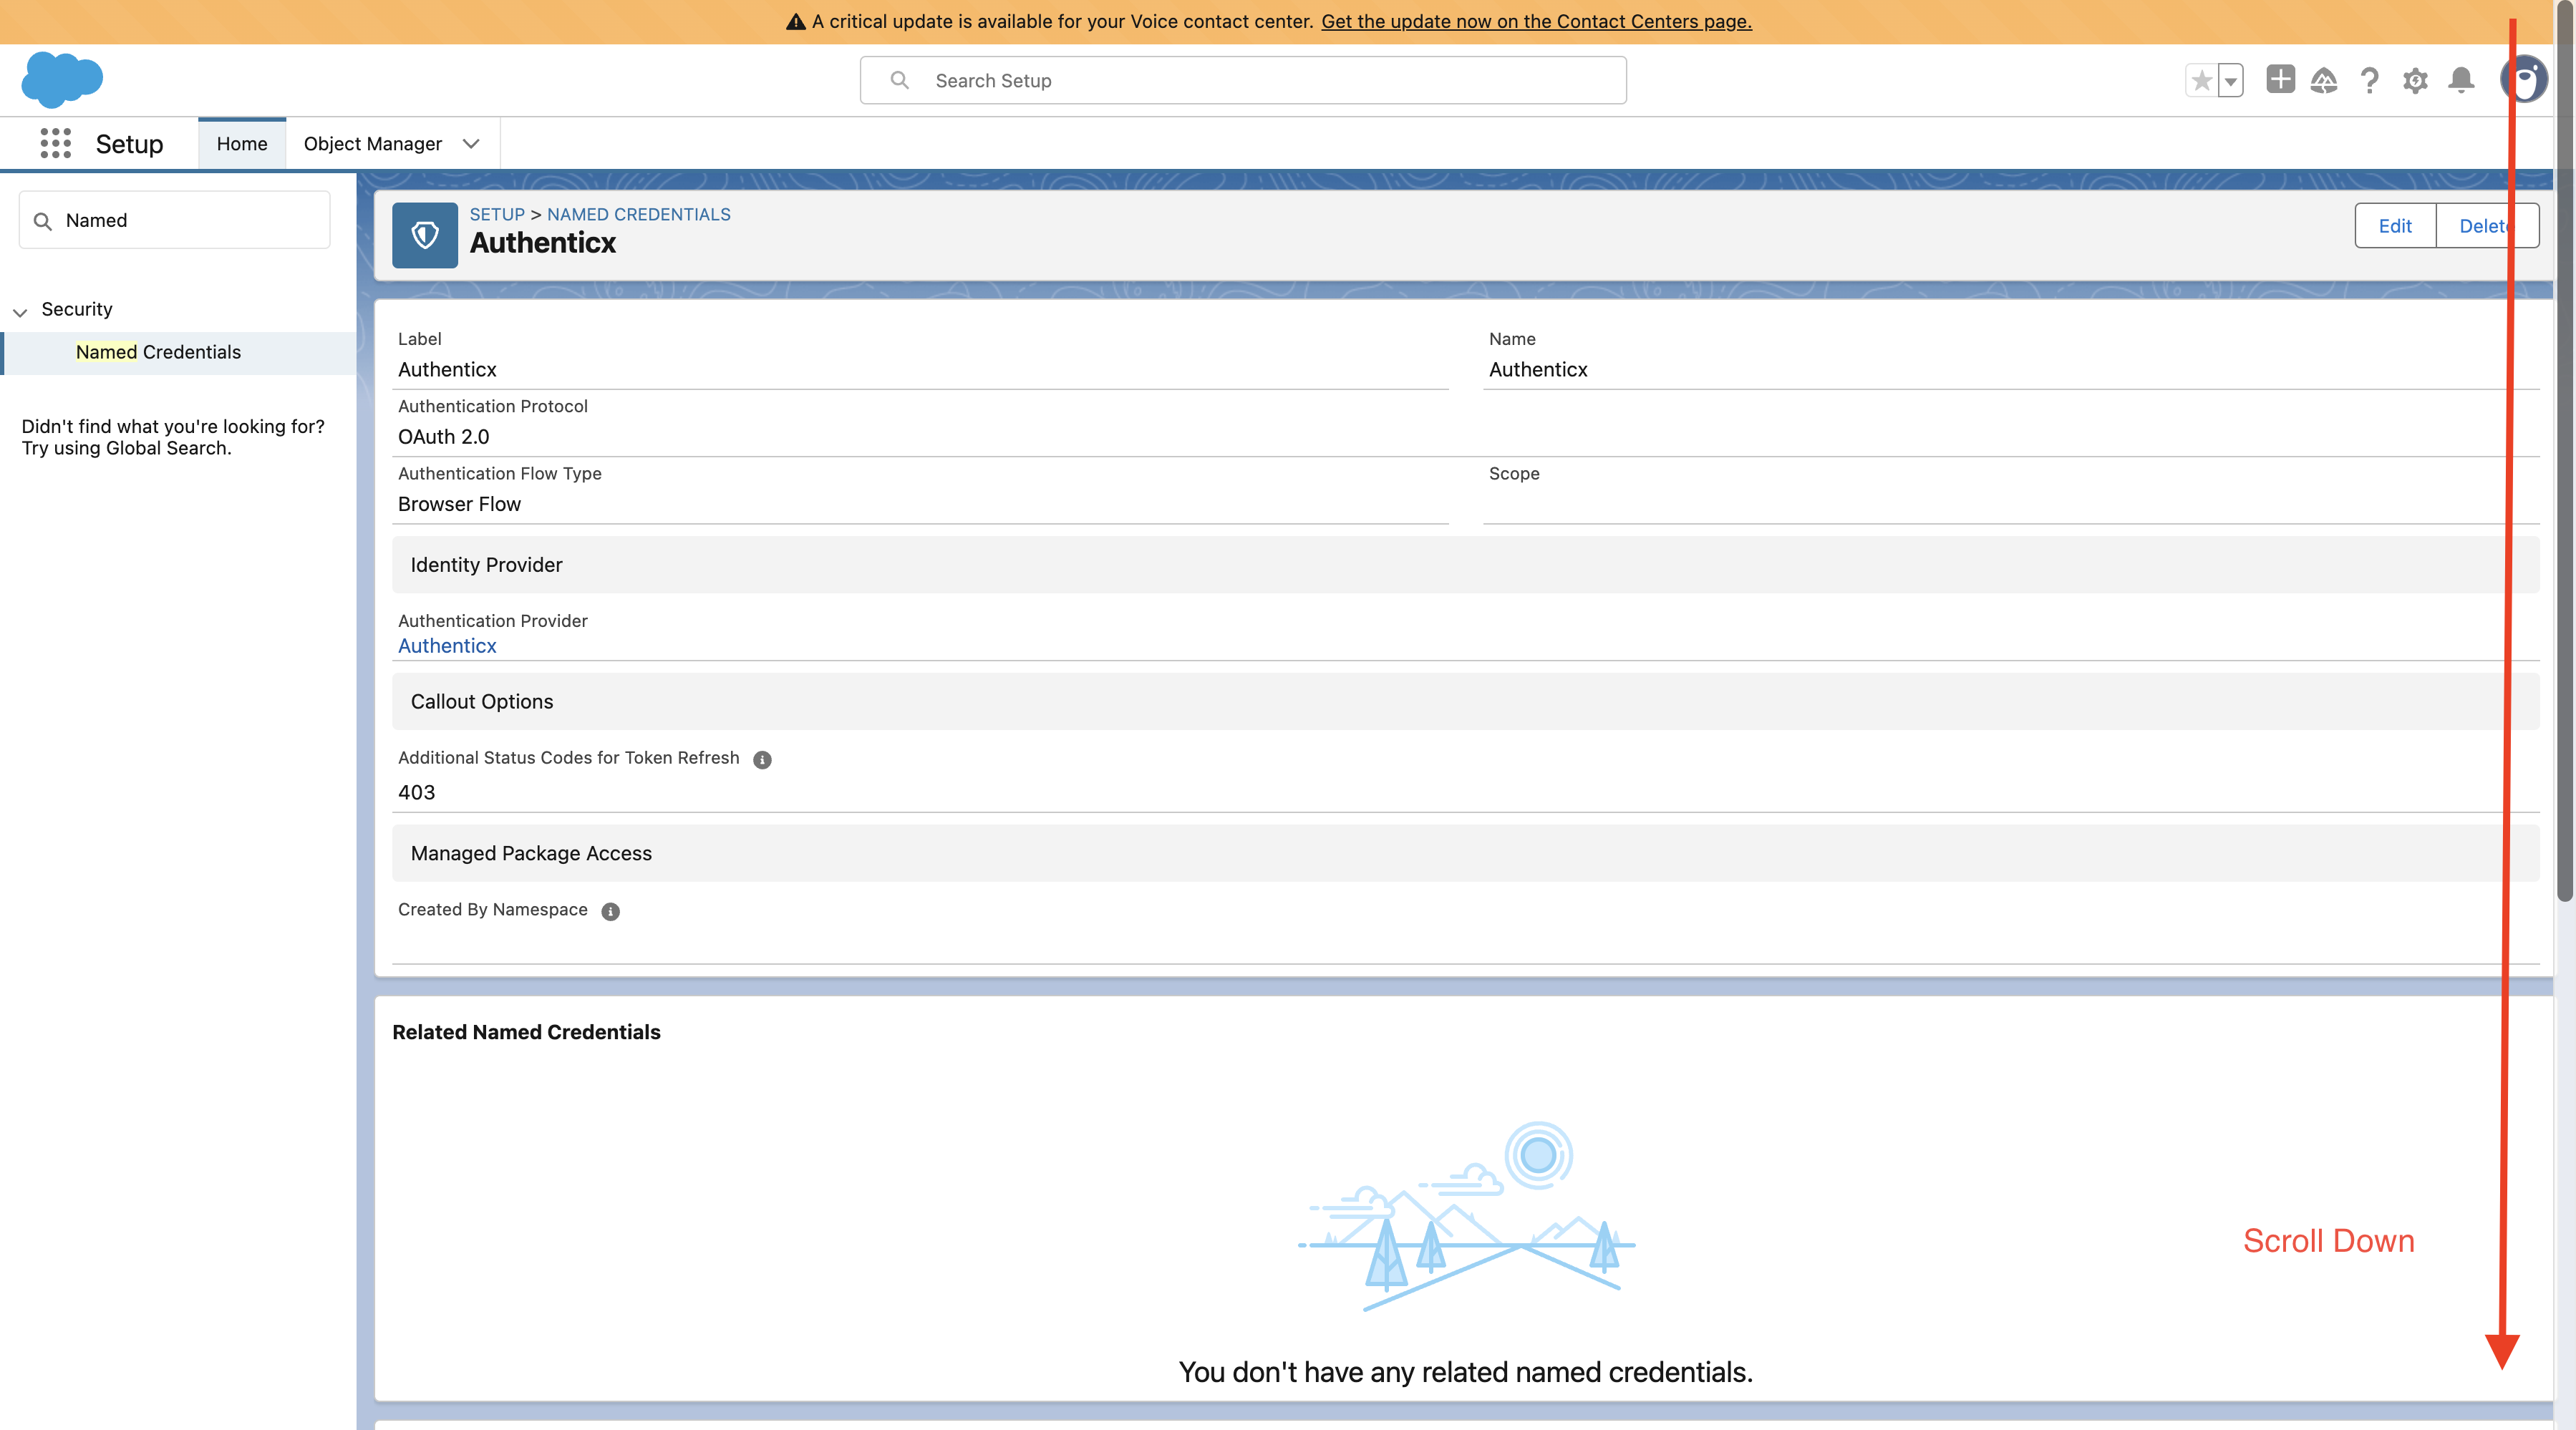
Add a Principal to the Credential
After saving, you’ll land on the External Credential details page. Scroll to the Principals section and follow these steps:
1. Click New

2. Enter the following values:
| Field | Value |
|---|---|
| Parameter Name | Authenticx |
| Sequence Number | 1 (auto-filled) |
| Identity Type | Per User Principal |
| Scope | (leave blank) |
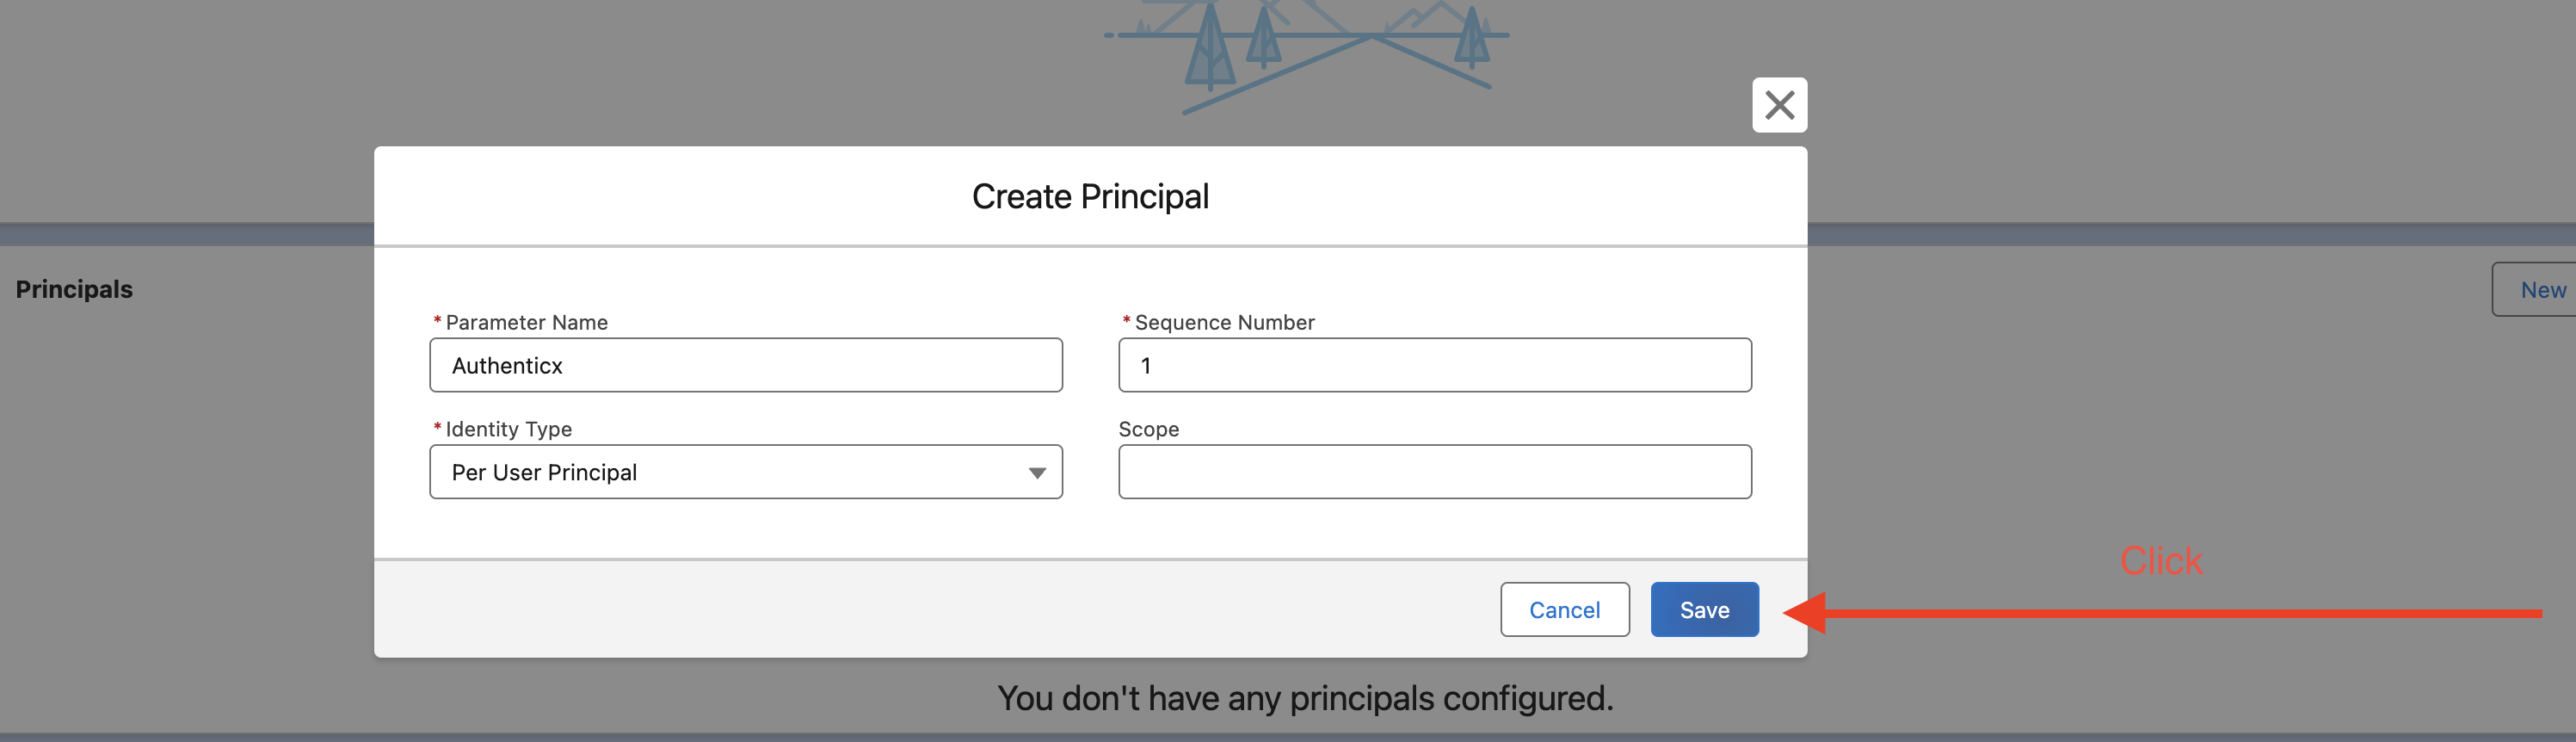
Review & Click Save.
Completion
🎉 You’re done!
You should now see your External Credential with the configured Principal.