Creating Named Credentials
This guide outlines how to create a Named Credential in Salesforce to finalize your connection to Authenticx after configuring your External Credential and Auth Provider. This step follows completion of the Creating External Credentials setup.
Prerequisites
- A configured External Credential pointing to Authenticx (see Creating an External Credential guide)
- Salesforce Administrator access
Configuration Steps
1. Log into Salesforce
Sign in using your administrator credentials.
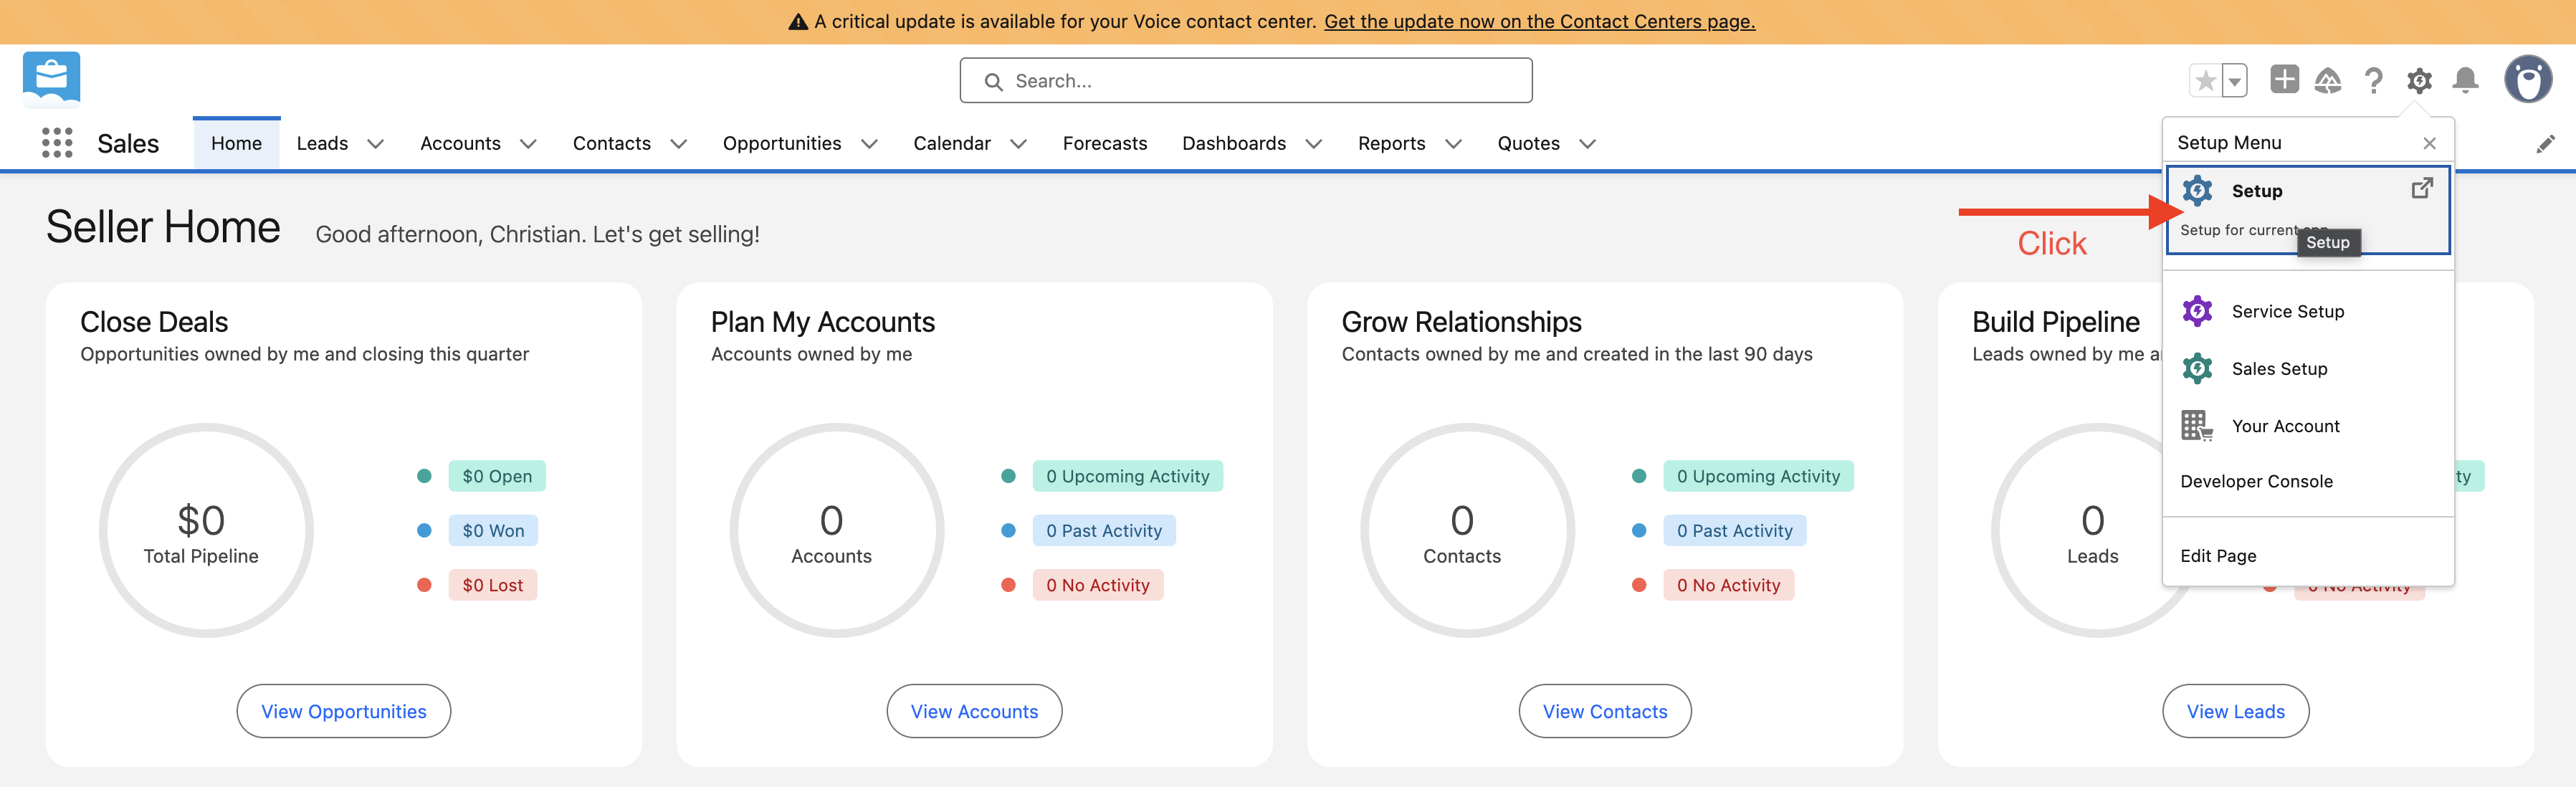
2. Open Setup
Click the ⚙️ Setup icon in the upper right and select Setup.
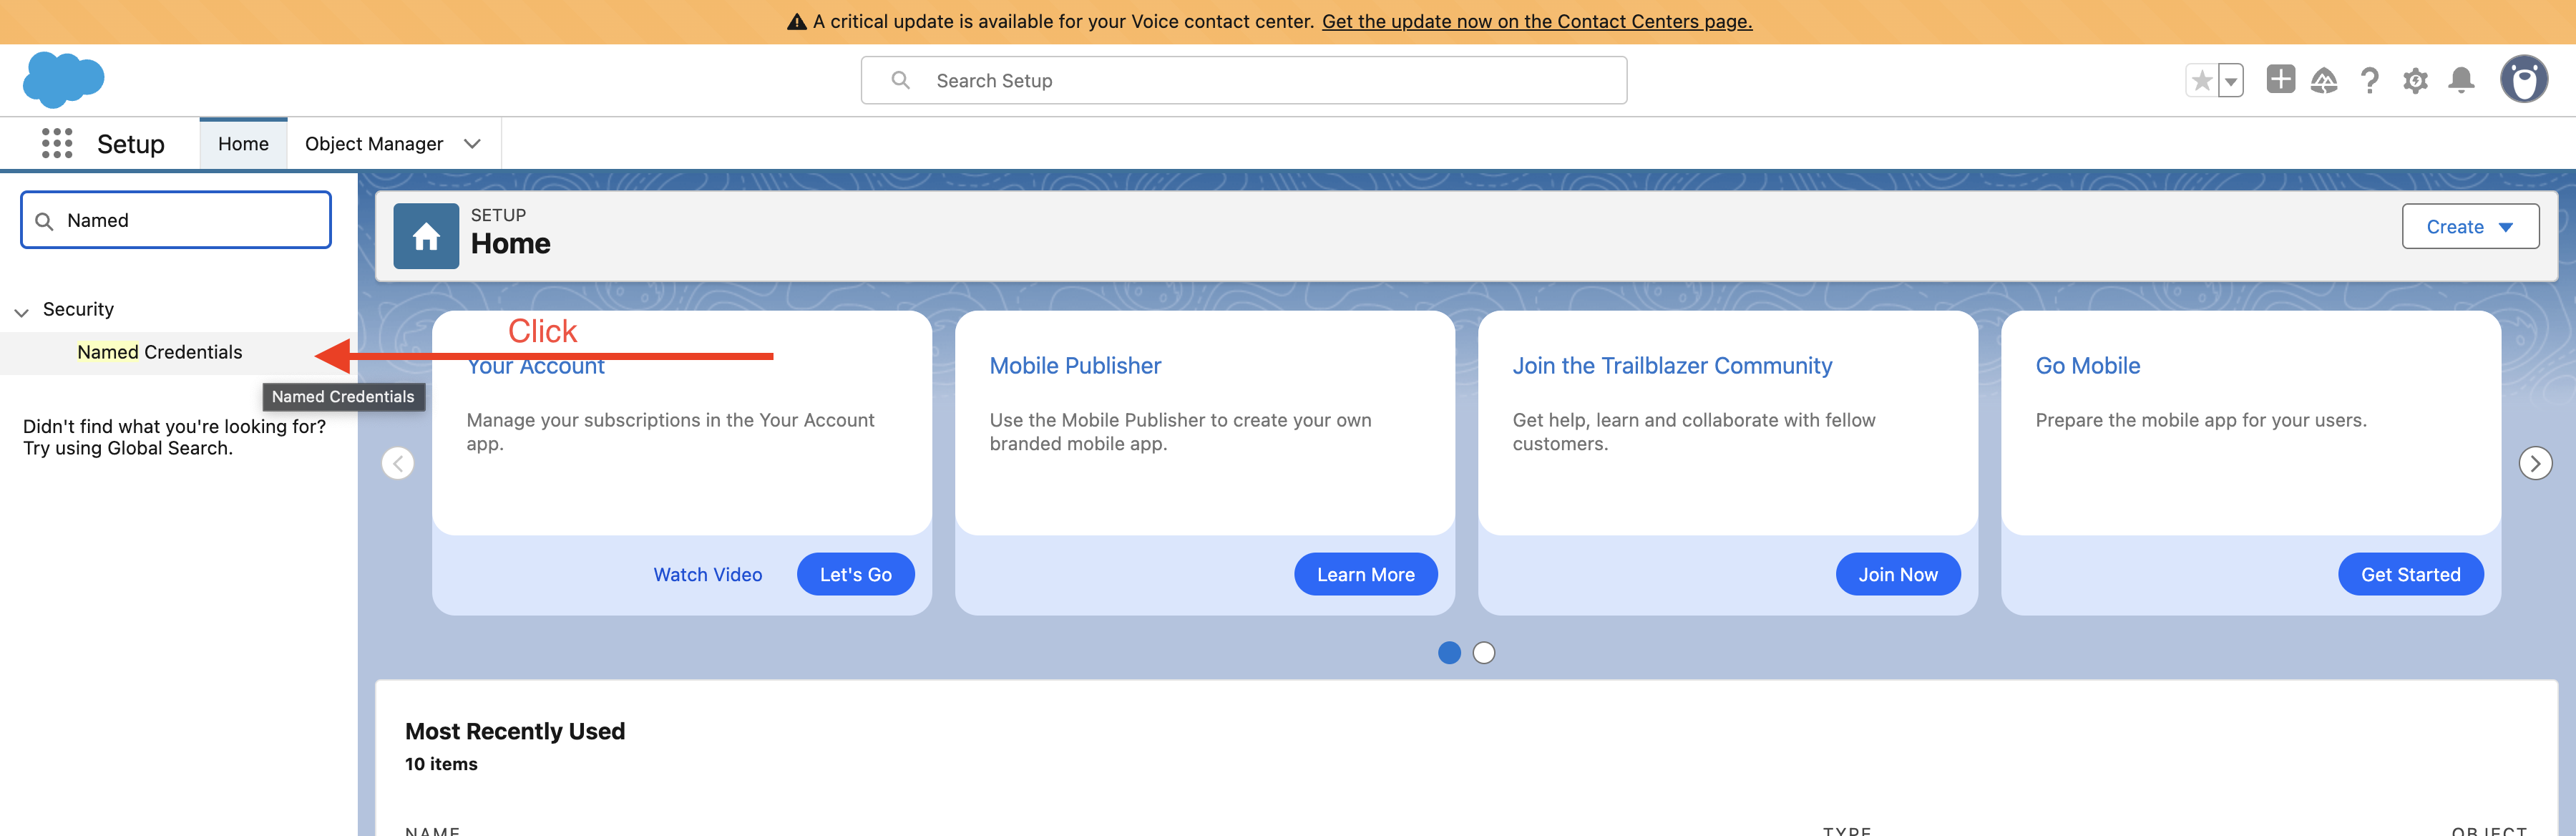
3. Navigate to "Named Credentials"
In the Quick Find box (left menu), type Named and select Named Credentials under the Security group.
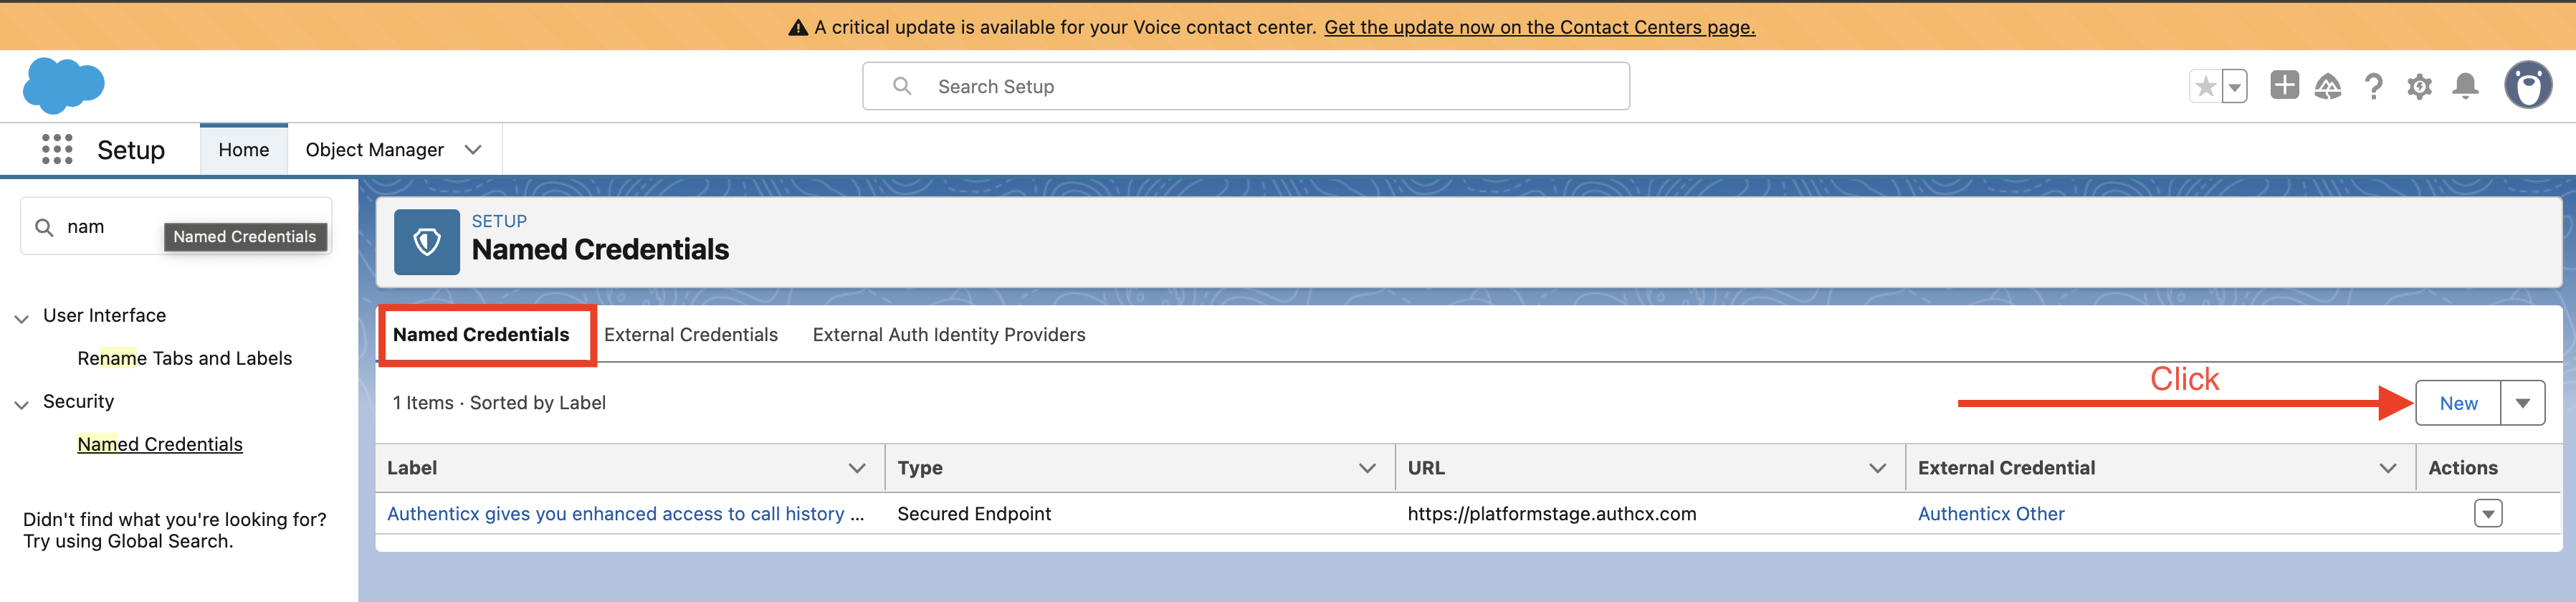
4. Create a New Named Credential
Ensure you're in the Named Credentials tab, then click New.
Fill in the form as follows:
| Field | Value |
|---|---|
| Label | Authenticx enriches call history and analytics |
| Name | AuthenticxPlatform (preserve casing exactly) |
| URL | https://platform.beauthenticx.com |
| External Credential | Authenticx (select from dropdown) |
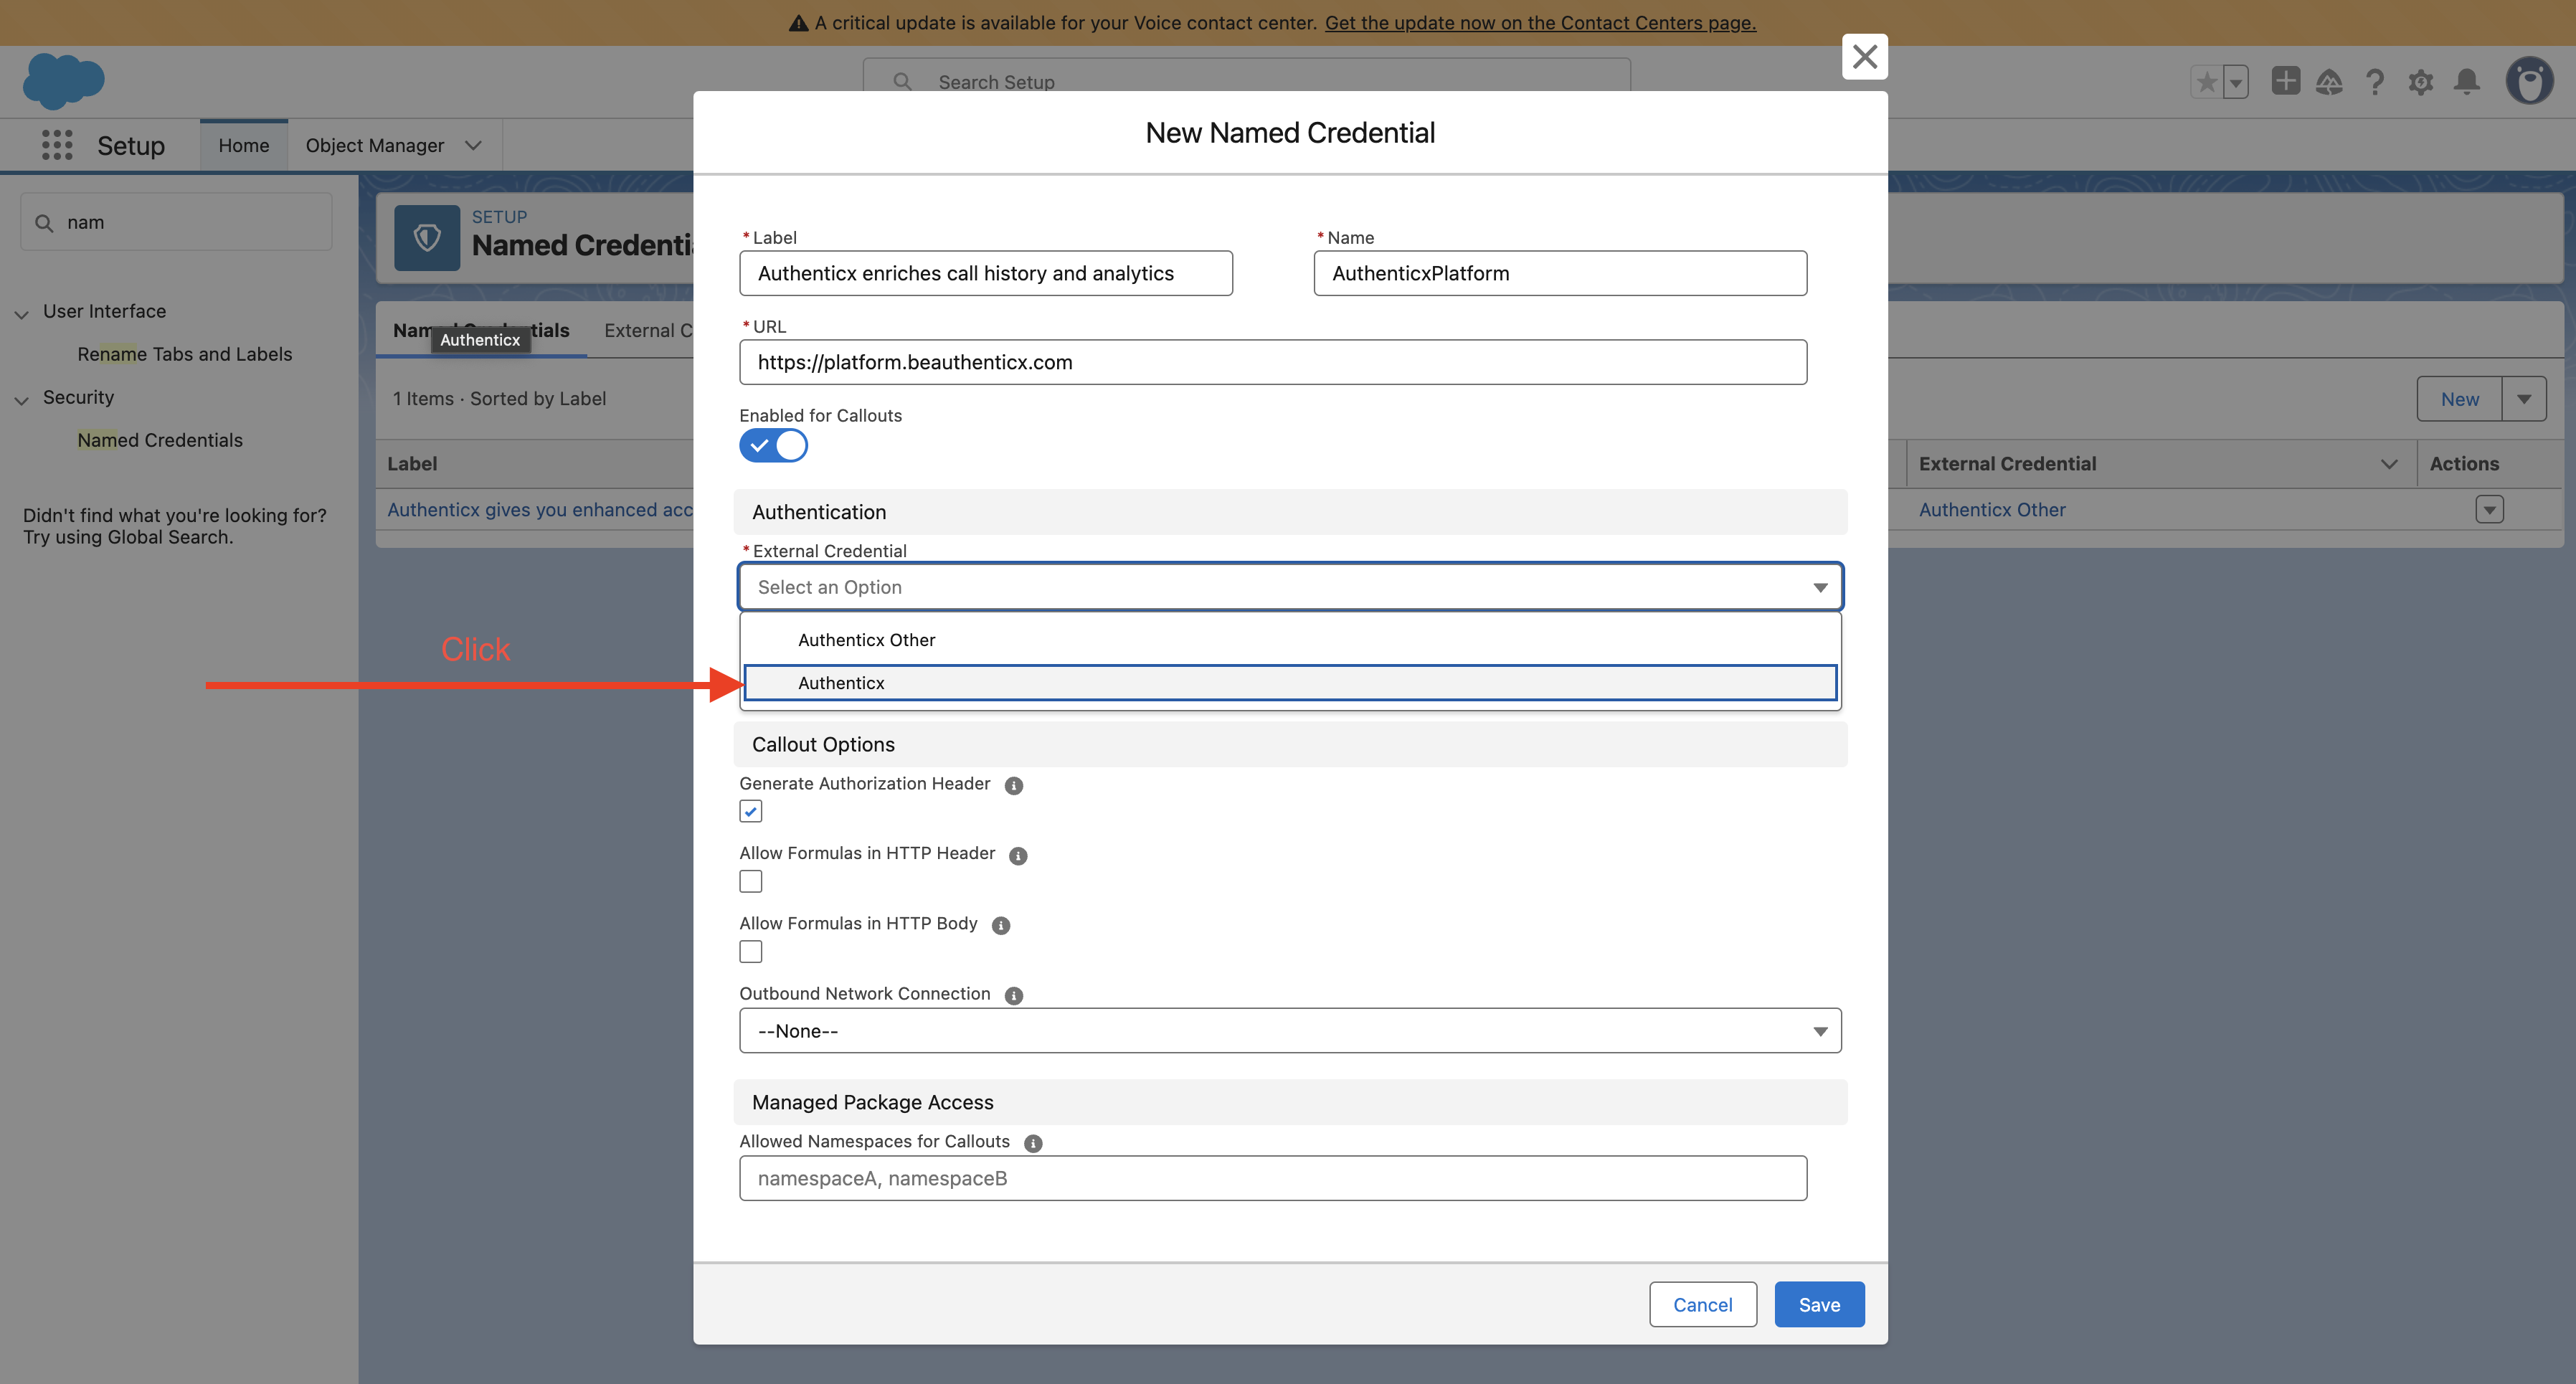
Note: If you don't see Authenticx in the dropdown, first complete the Creating an External Credentials step.
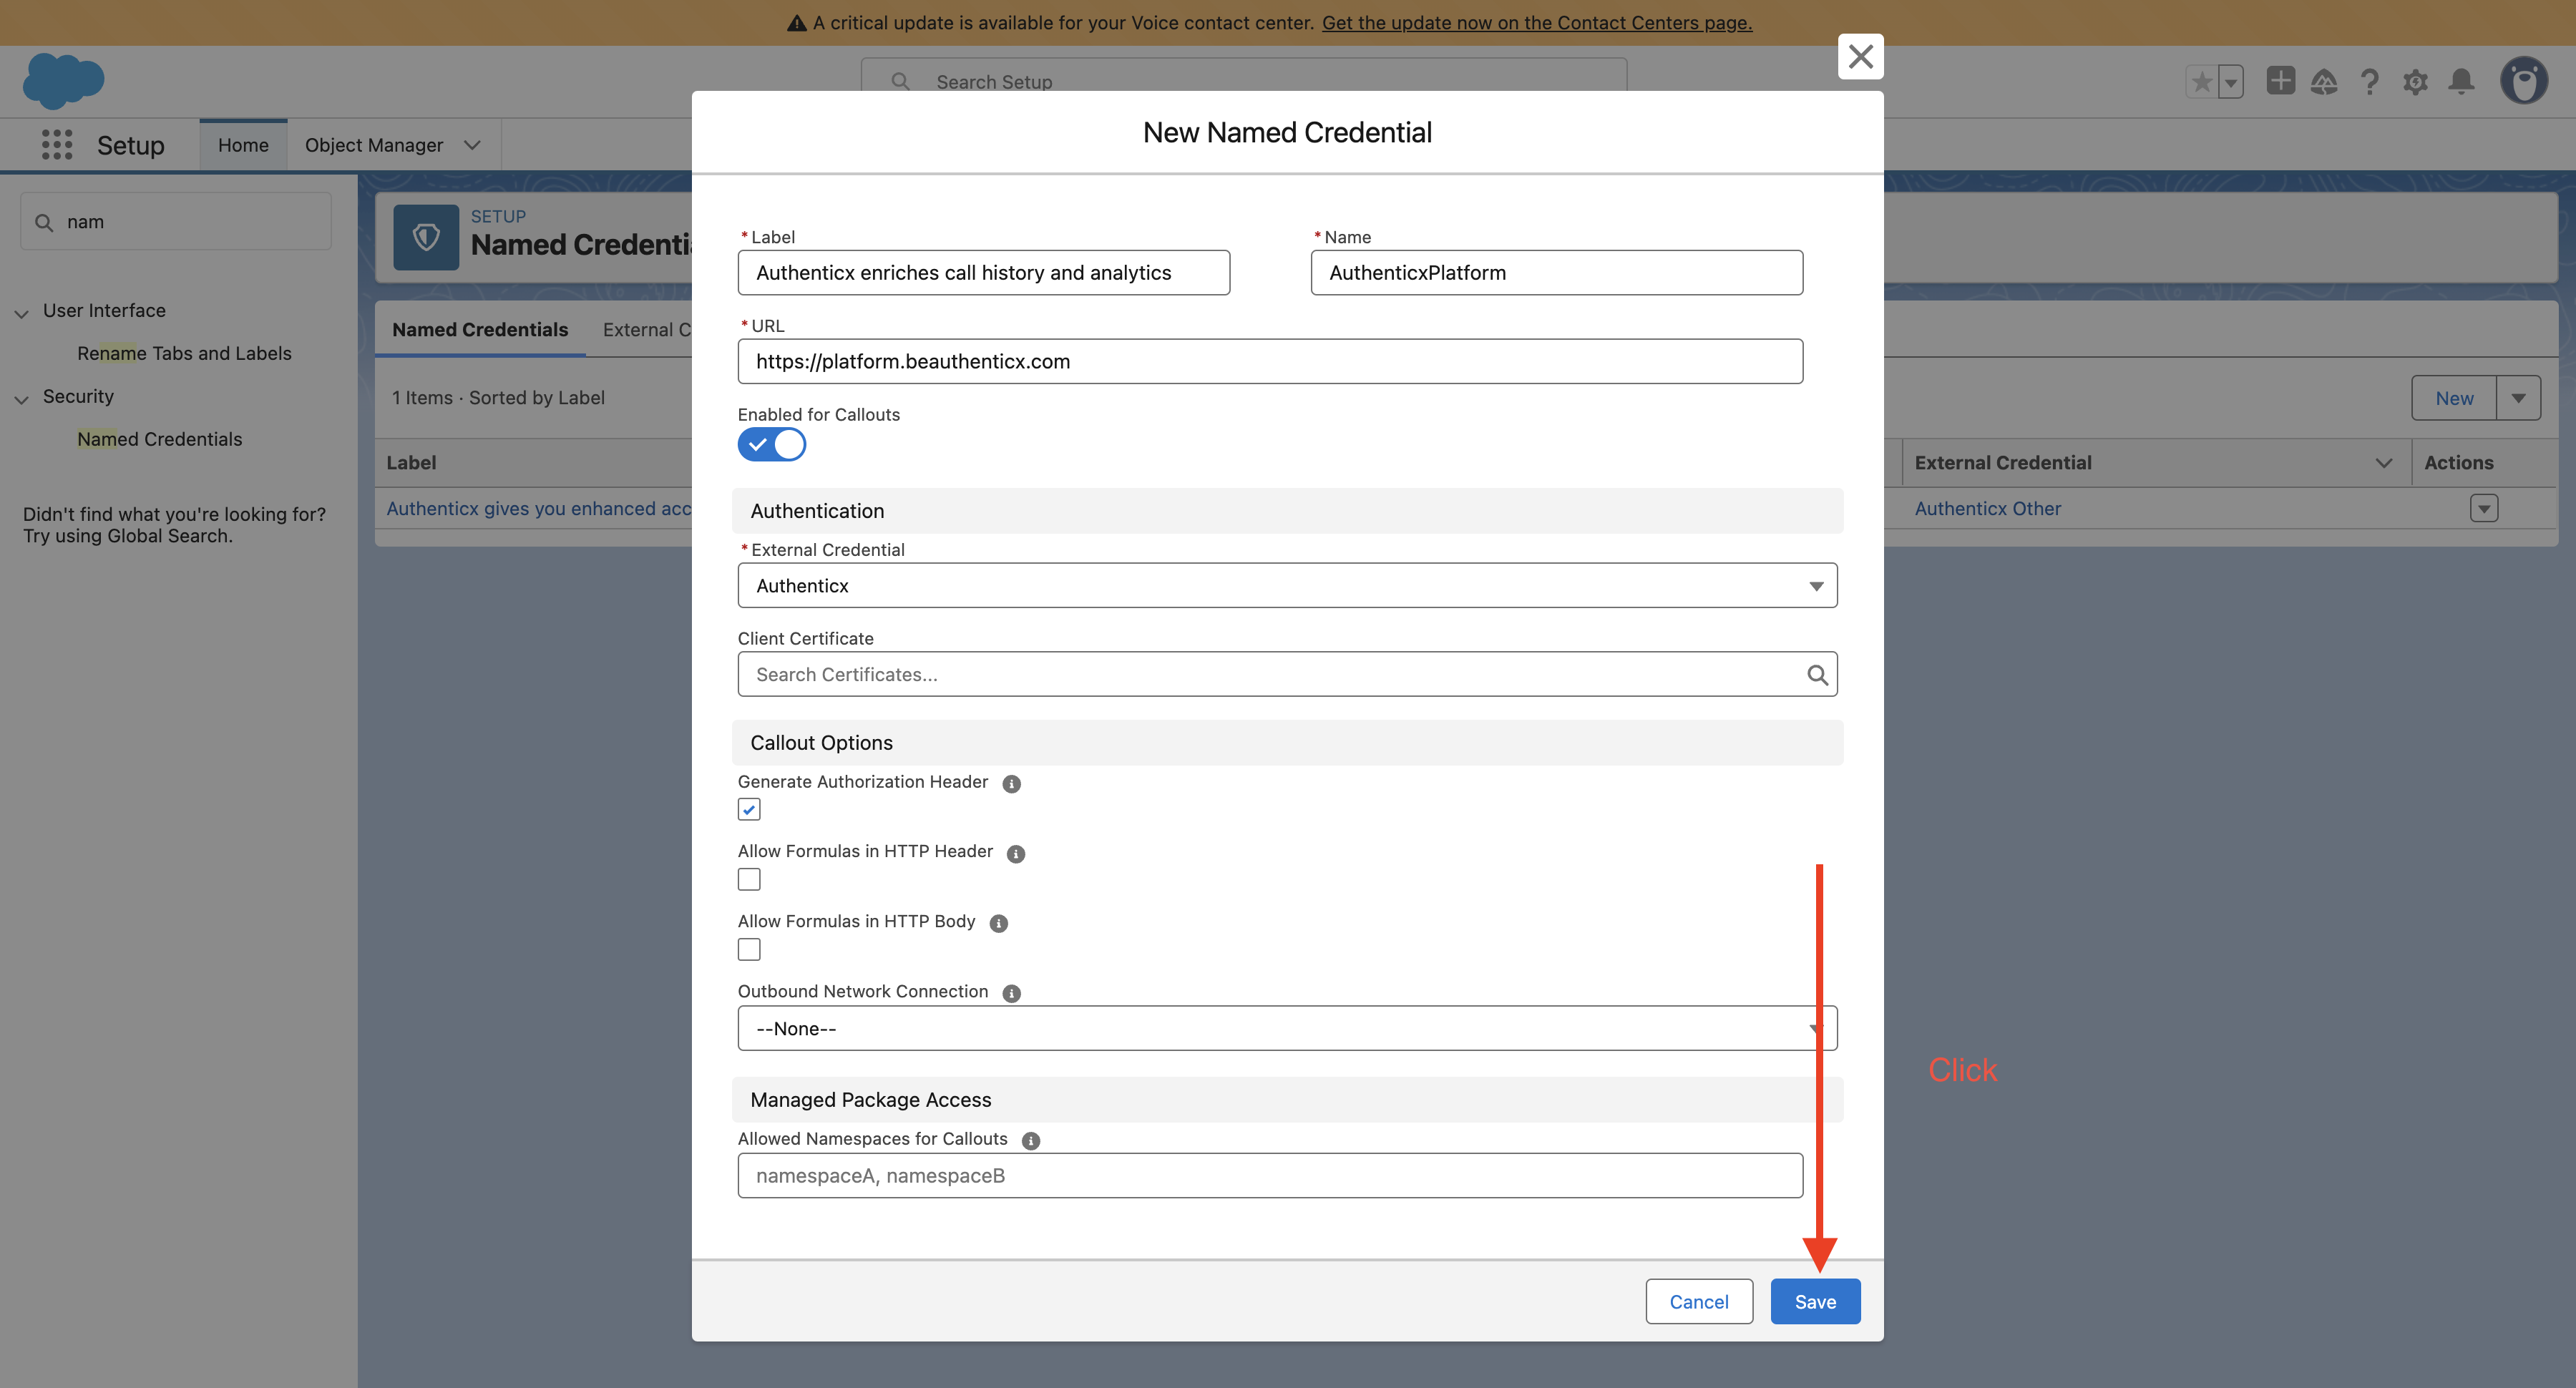
5. Save
Click the Save button at the bottom right.
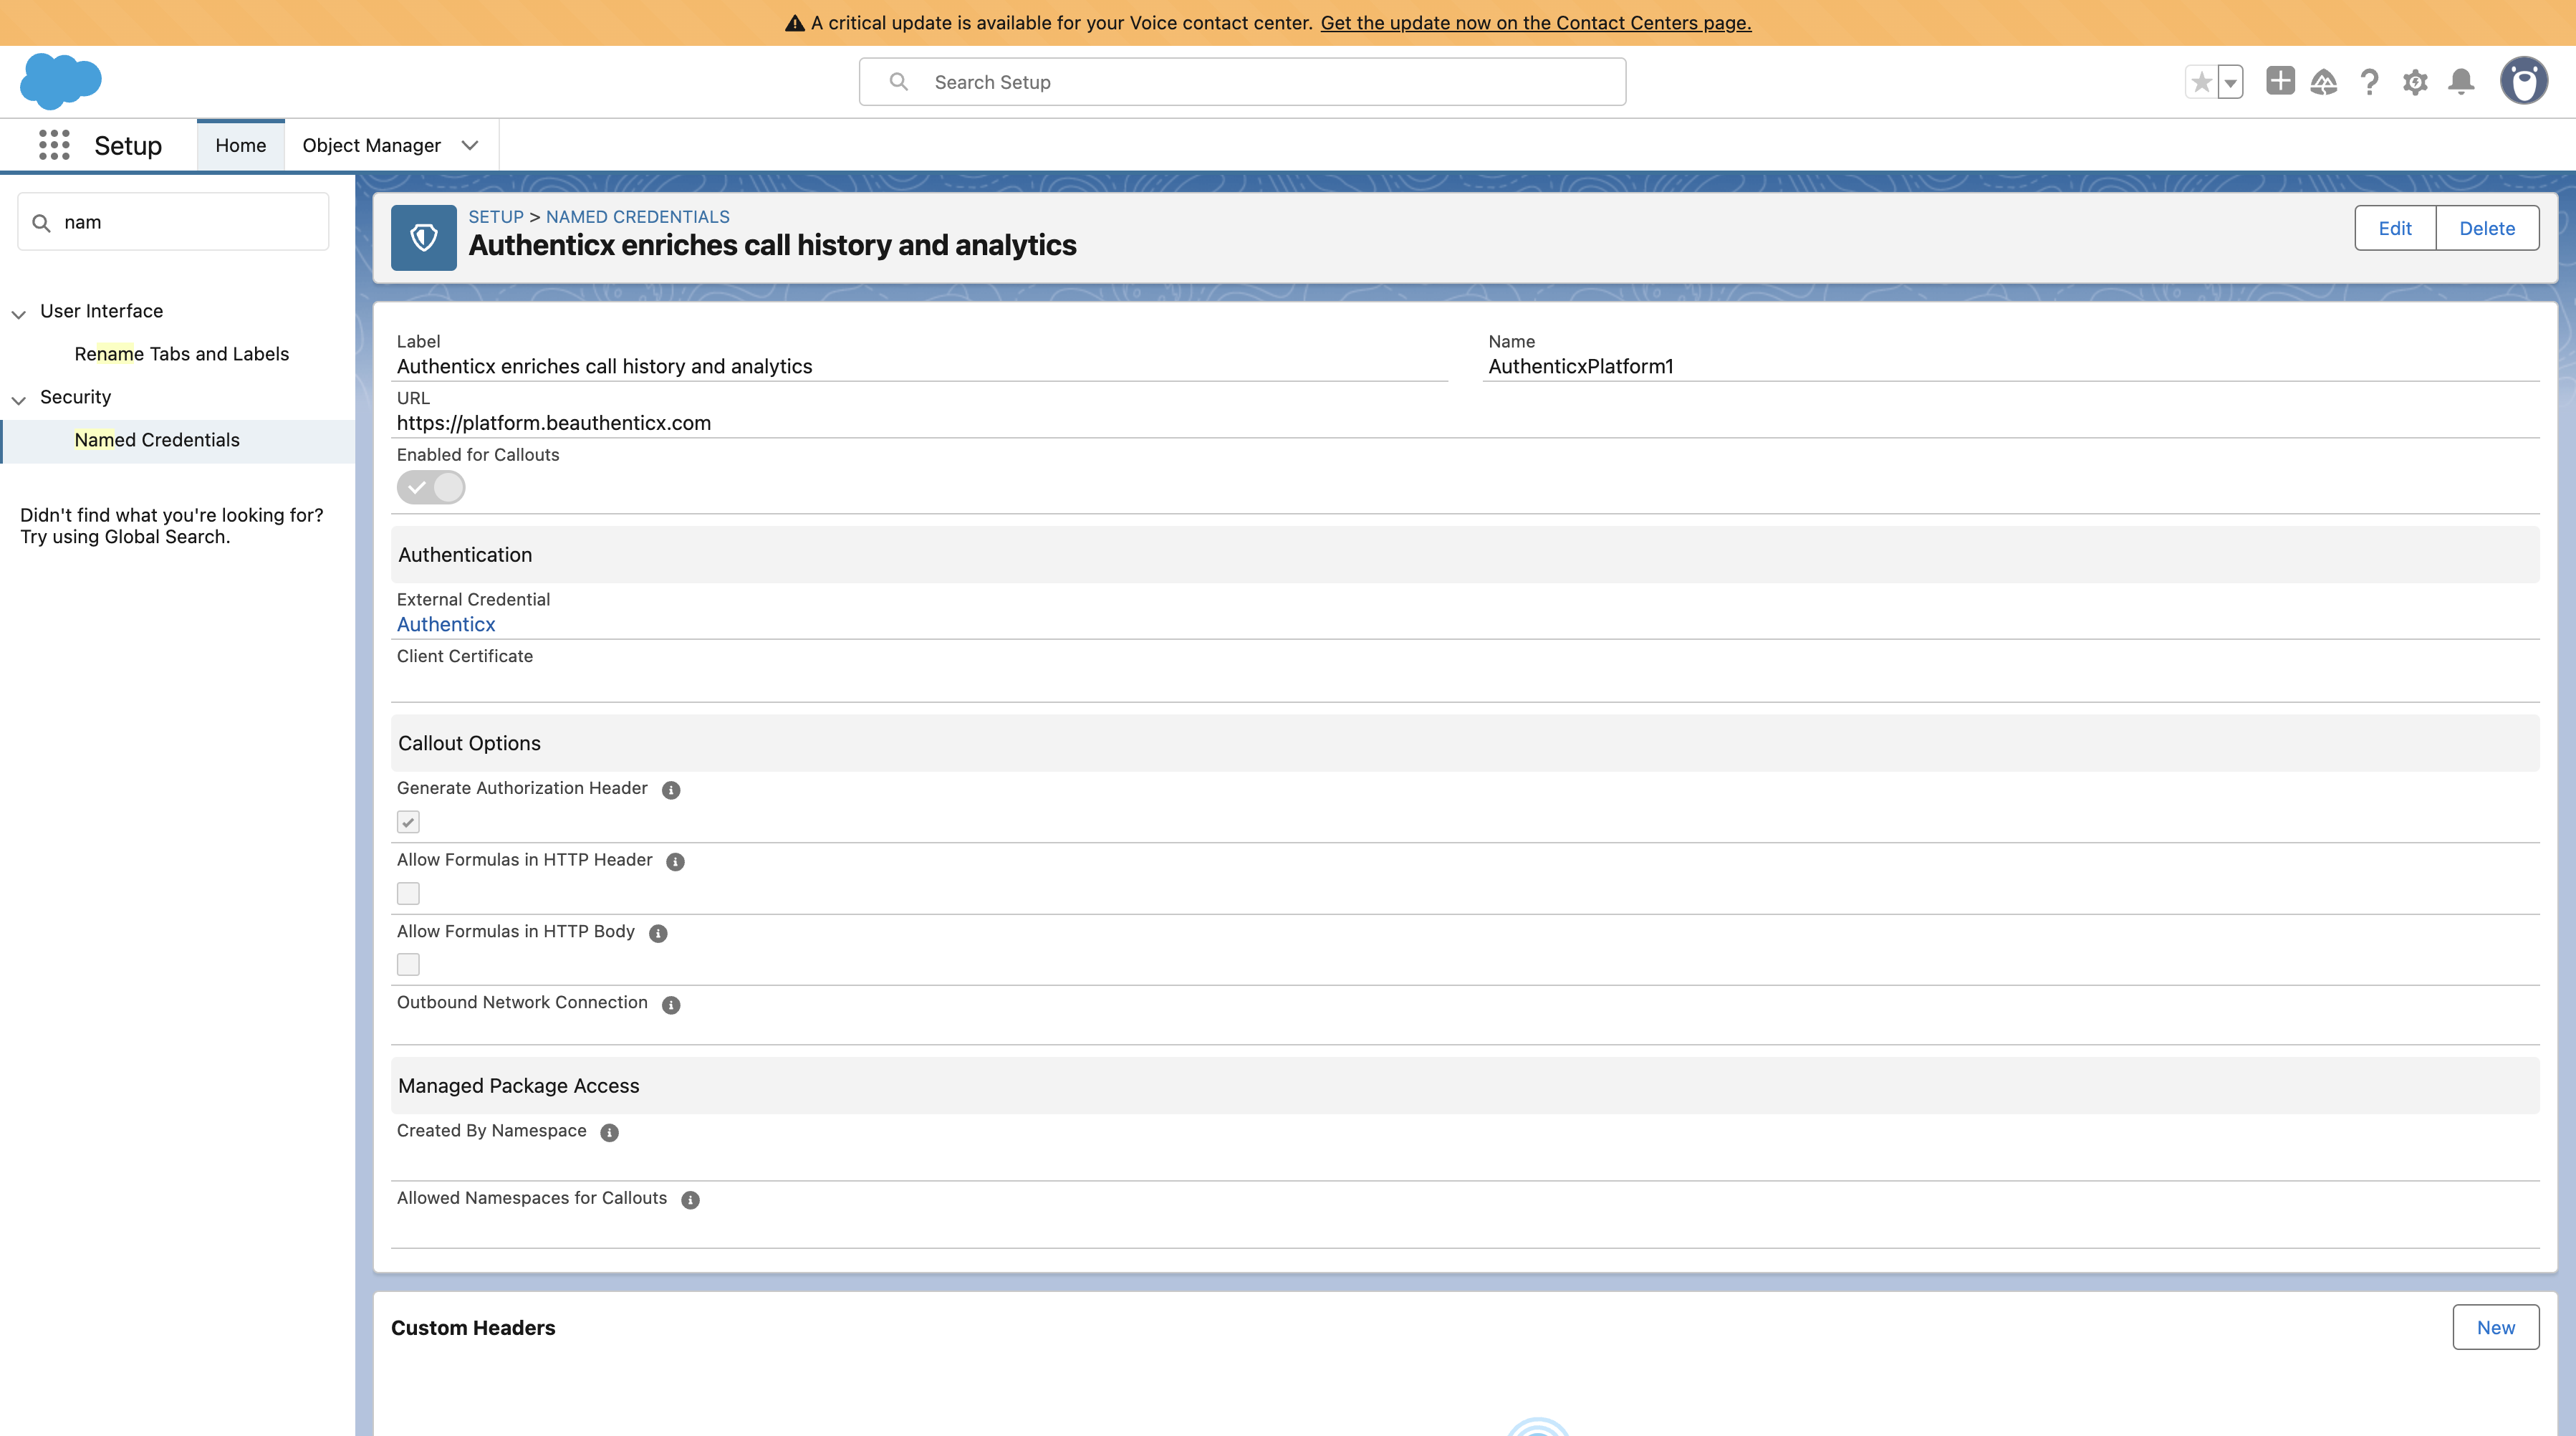
Completion
Named Credential successfully created!
You should see a screen displaying the details of your new credential.